 Workflow Notification
This article introduces how to use the notification feature of Zadig workflows.
Notification Scenarios:
- Notify when a workflow event occurs, such as when a workflow starts, completes successfully, or is canceled.
- Orchestrate notification tasks within the process, for example, notifying a tester to confirm an operation at a specific node in the workflow.
Notification Methods:
- Feishu Group Notification
- Feishu Member Notification
- DingTalk
- Enterprise WeChat
- Microsoft Teams
- Webhook
# Feishu Group Notification
Supports two configuration methods: "Custom Robot" and "Self-Built Application"
# How to Configure
# Custom Robot Notification
Step 1: Add a custom robot to the Feishu group and obtain the Webhook address. Refer to How to Use Robots in a Group(opens new window)
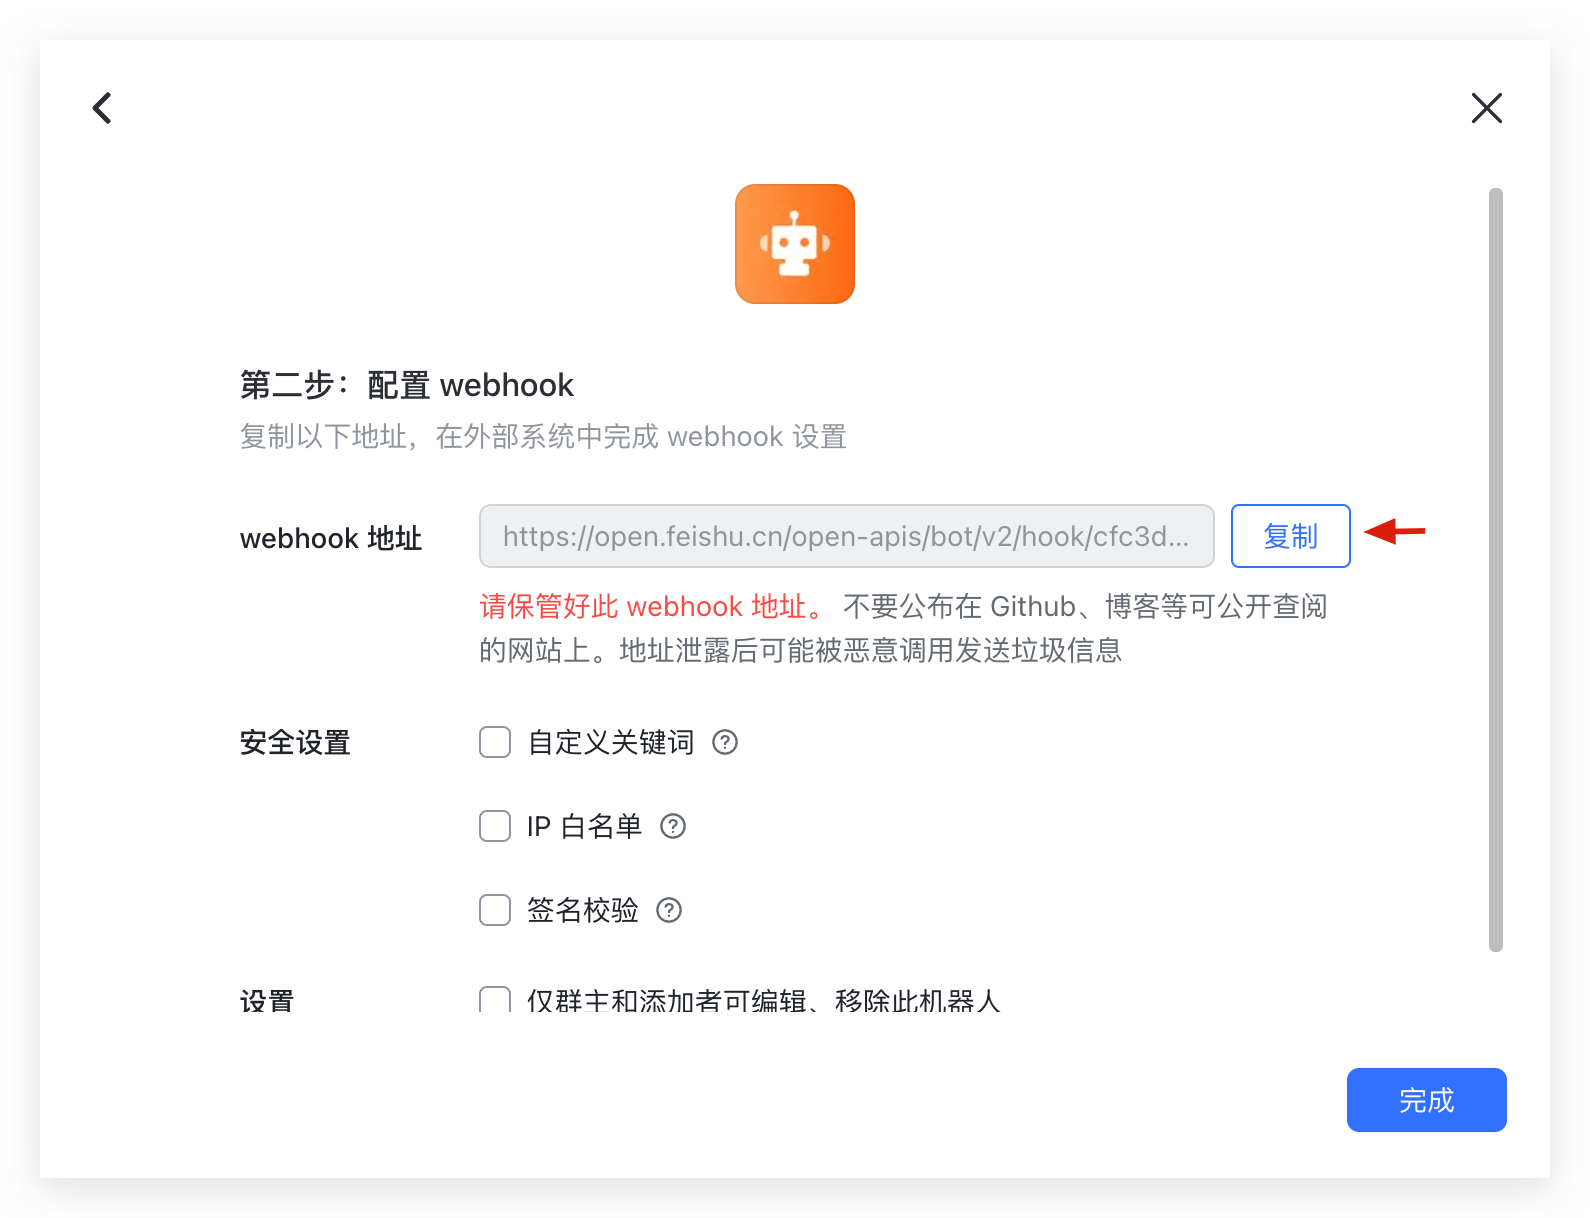
Step 2: Edit the workflow and add a Feishu notification.
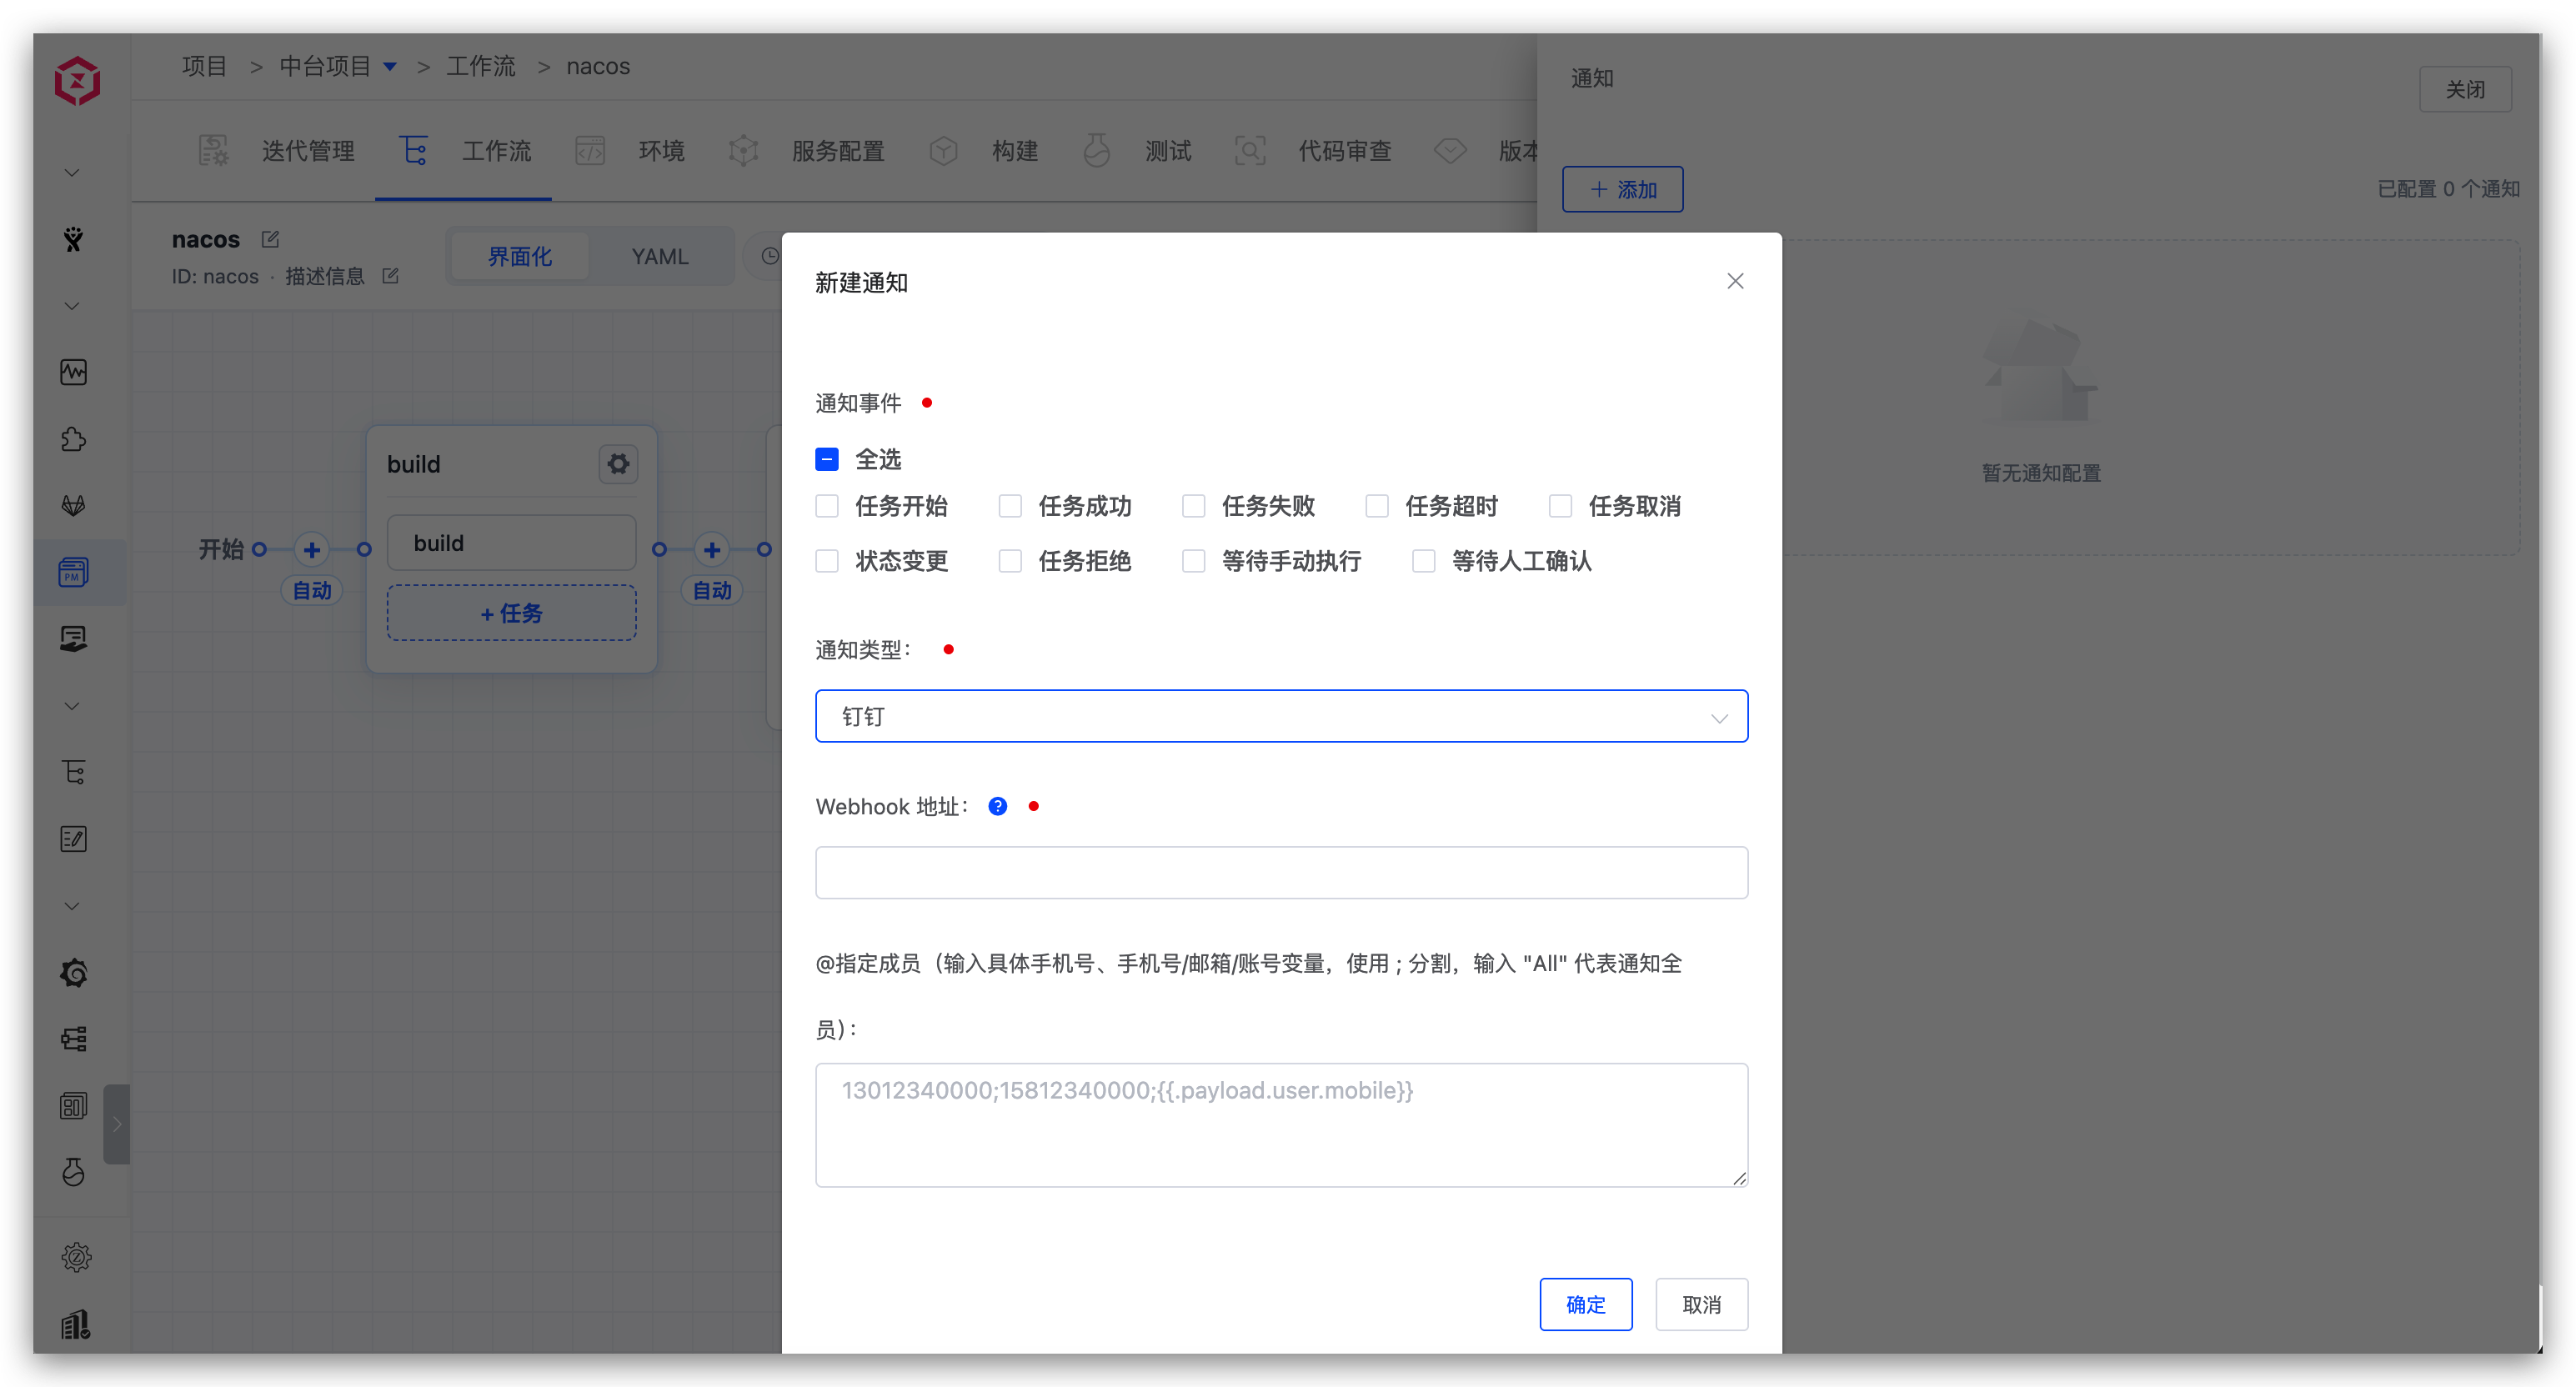
Parameter Description:
Notification Events: Configure the notification rules. Multiple workflow statuses can be selectedNotification Type: SelectFeishu Group Notification (Custom Robot)Webhook Address: The Webhook address obtained in Step 1@Specific Members: If you want to notify specific individuals, enter the corresponding user IDs, separated by;for multiple users
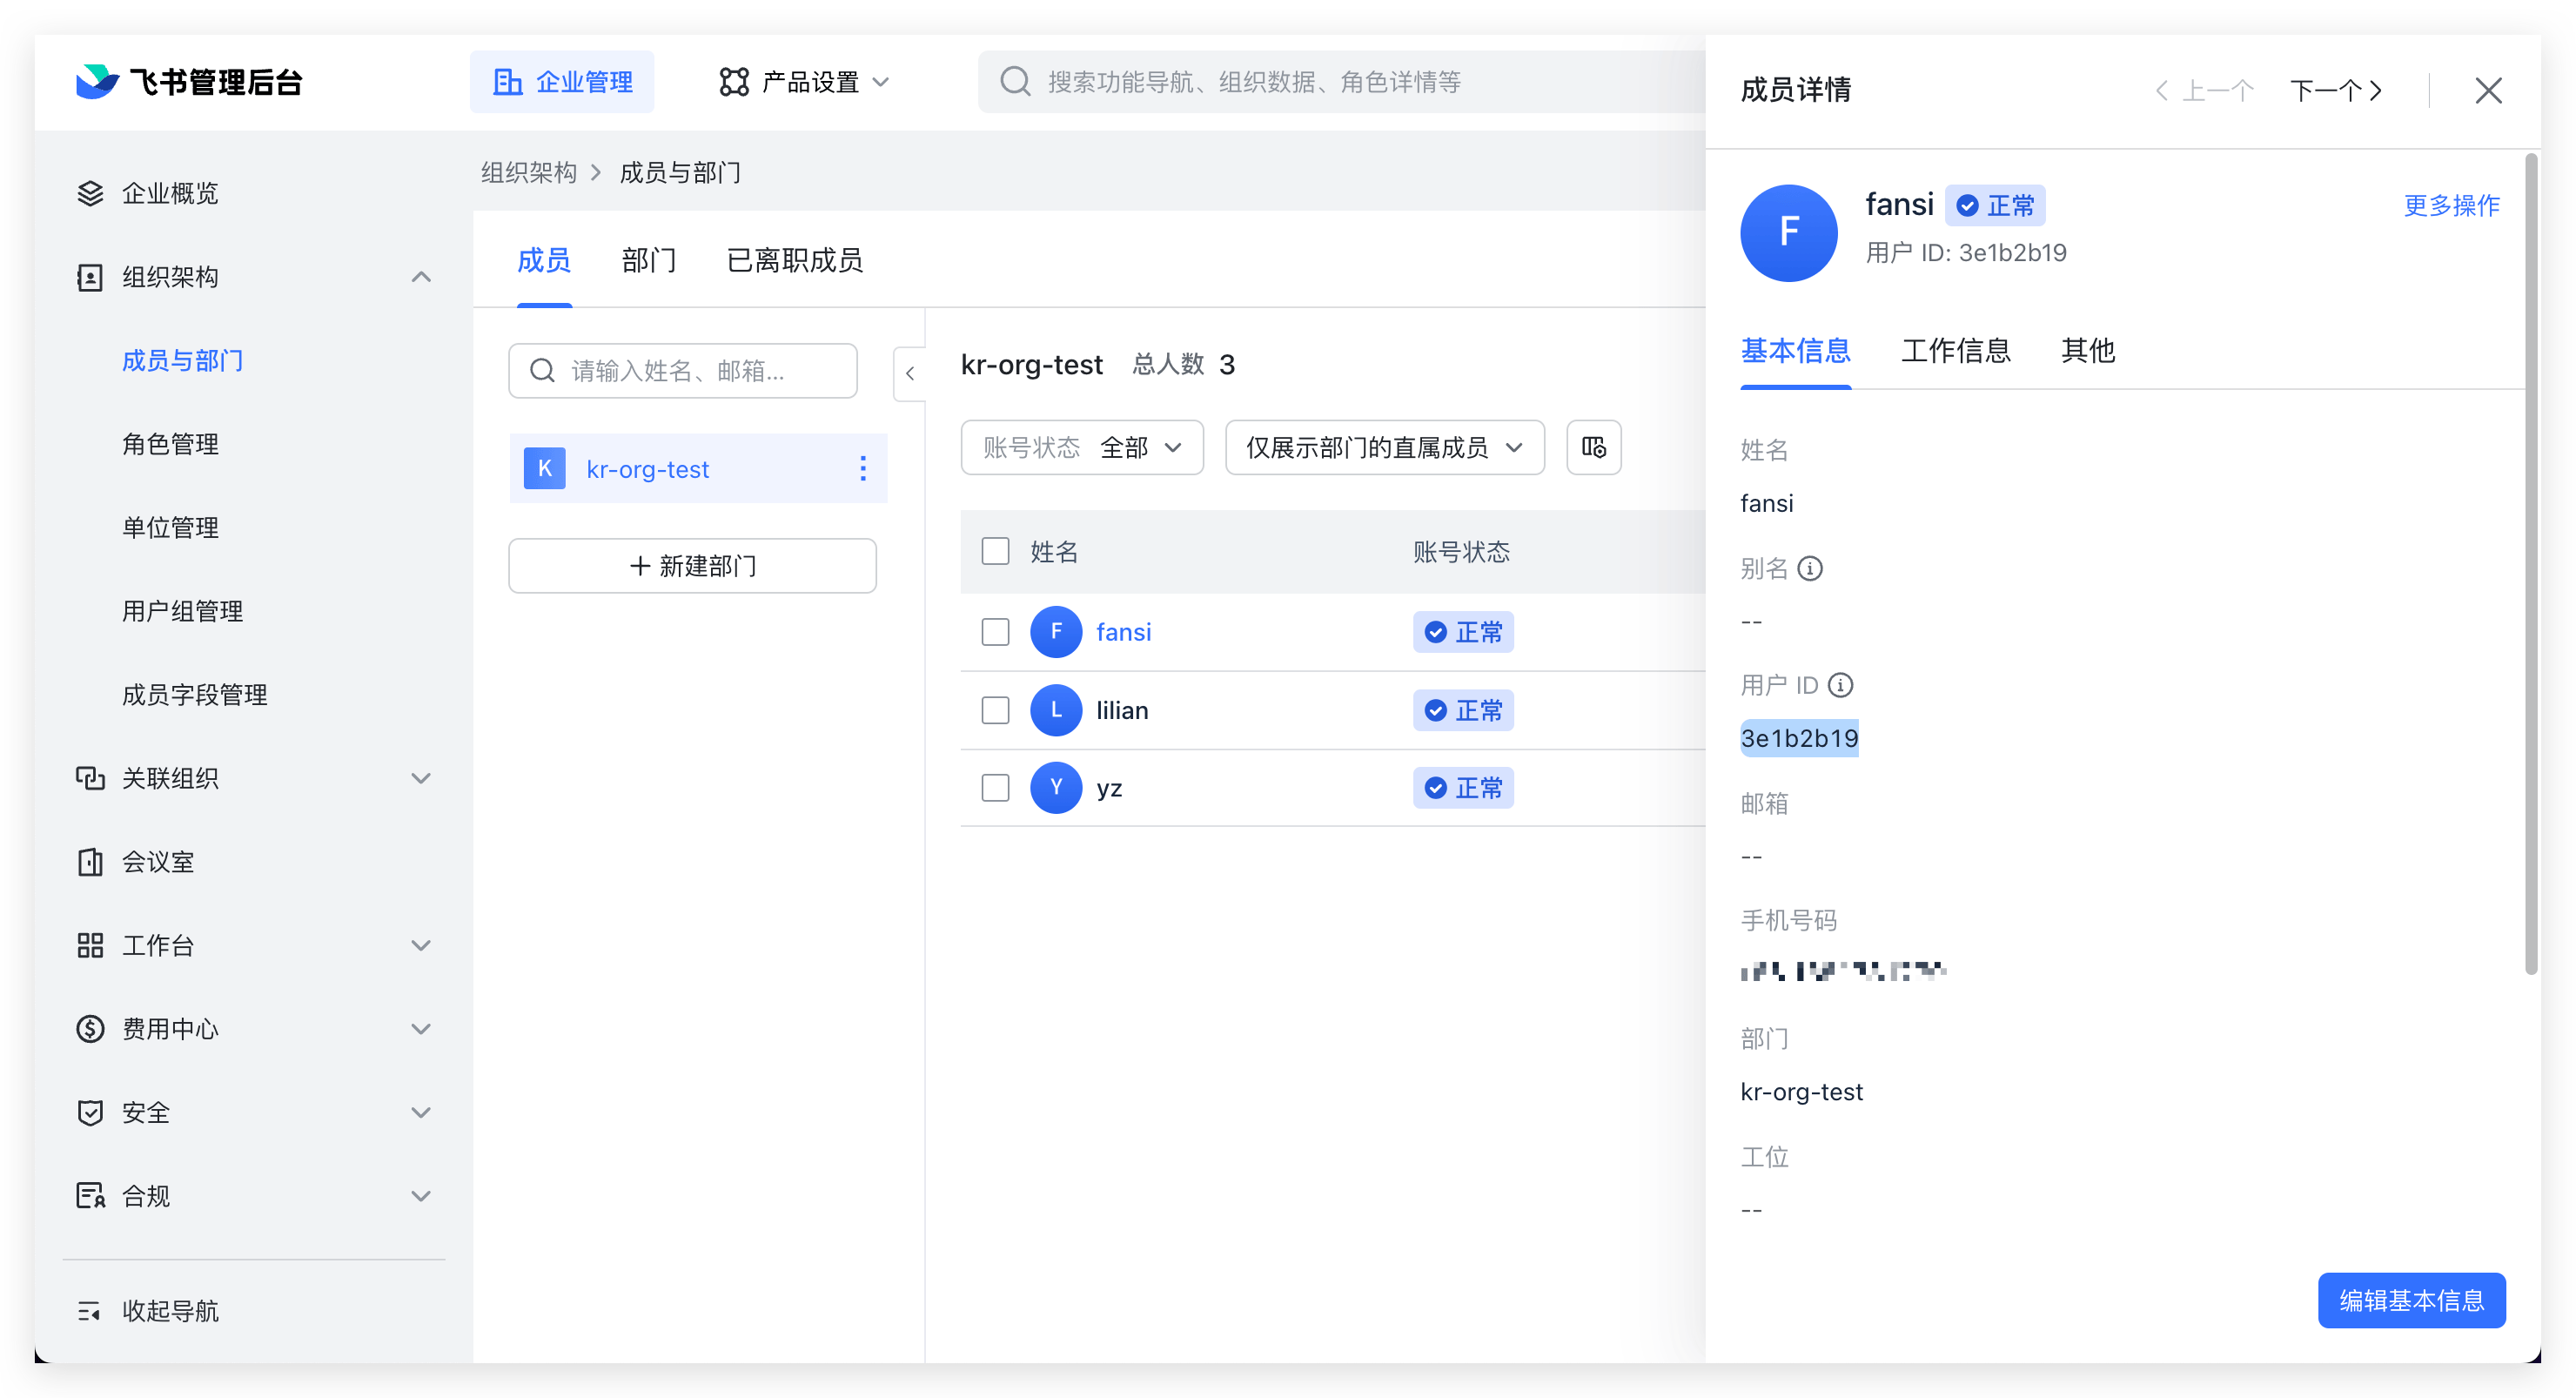
Enter the Feishu management backend, click Organizational Structure > Members and Departments, and select a member to obtain the ID.
# Self-Built Application Notification
Step 1: Integrate Feishu IM on Zadig.
Step 2: Edit the workflow and add a Feishu group notification (self-built application).
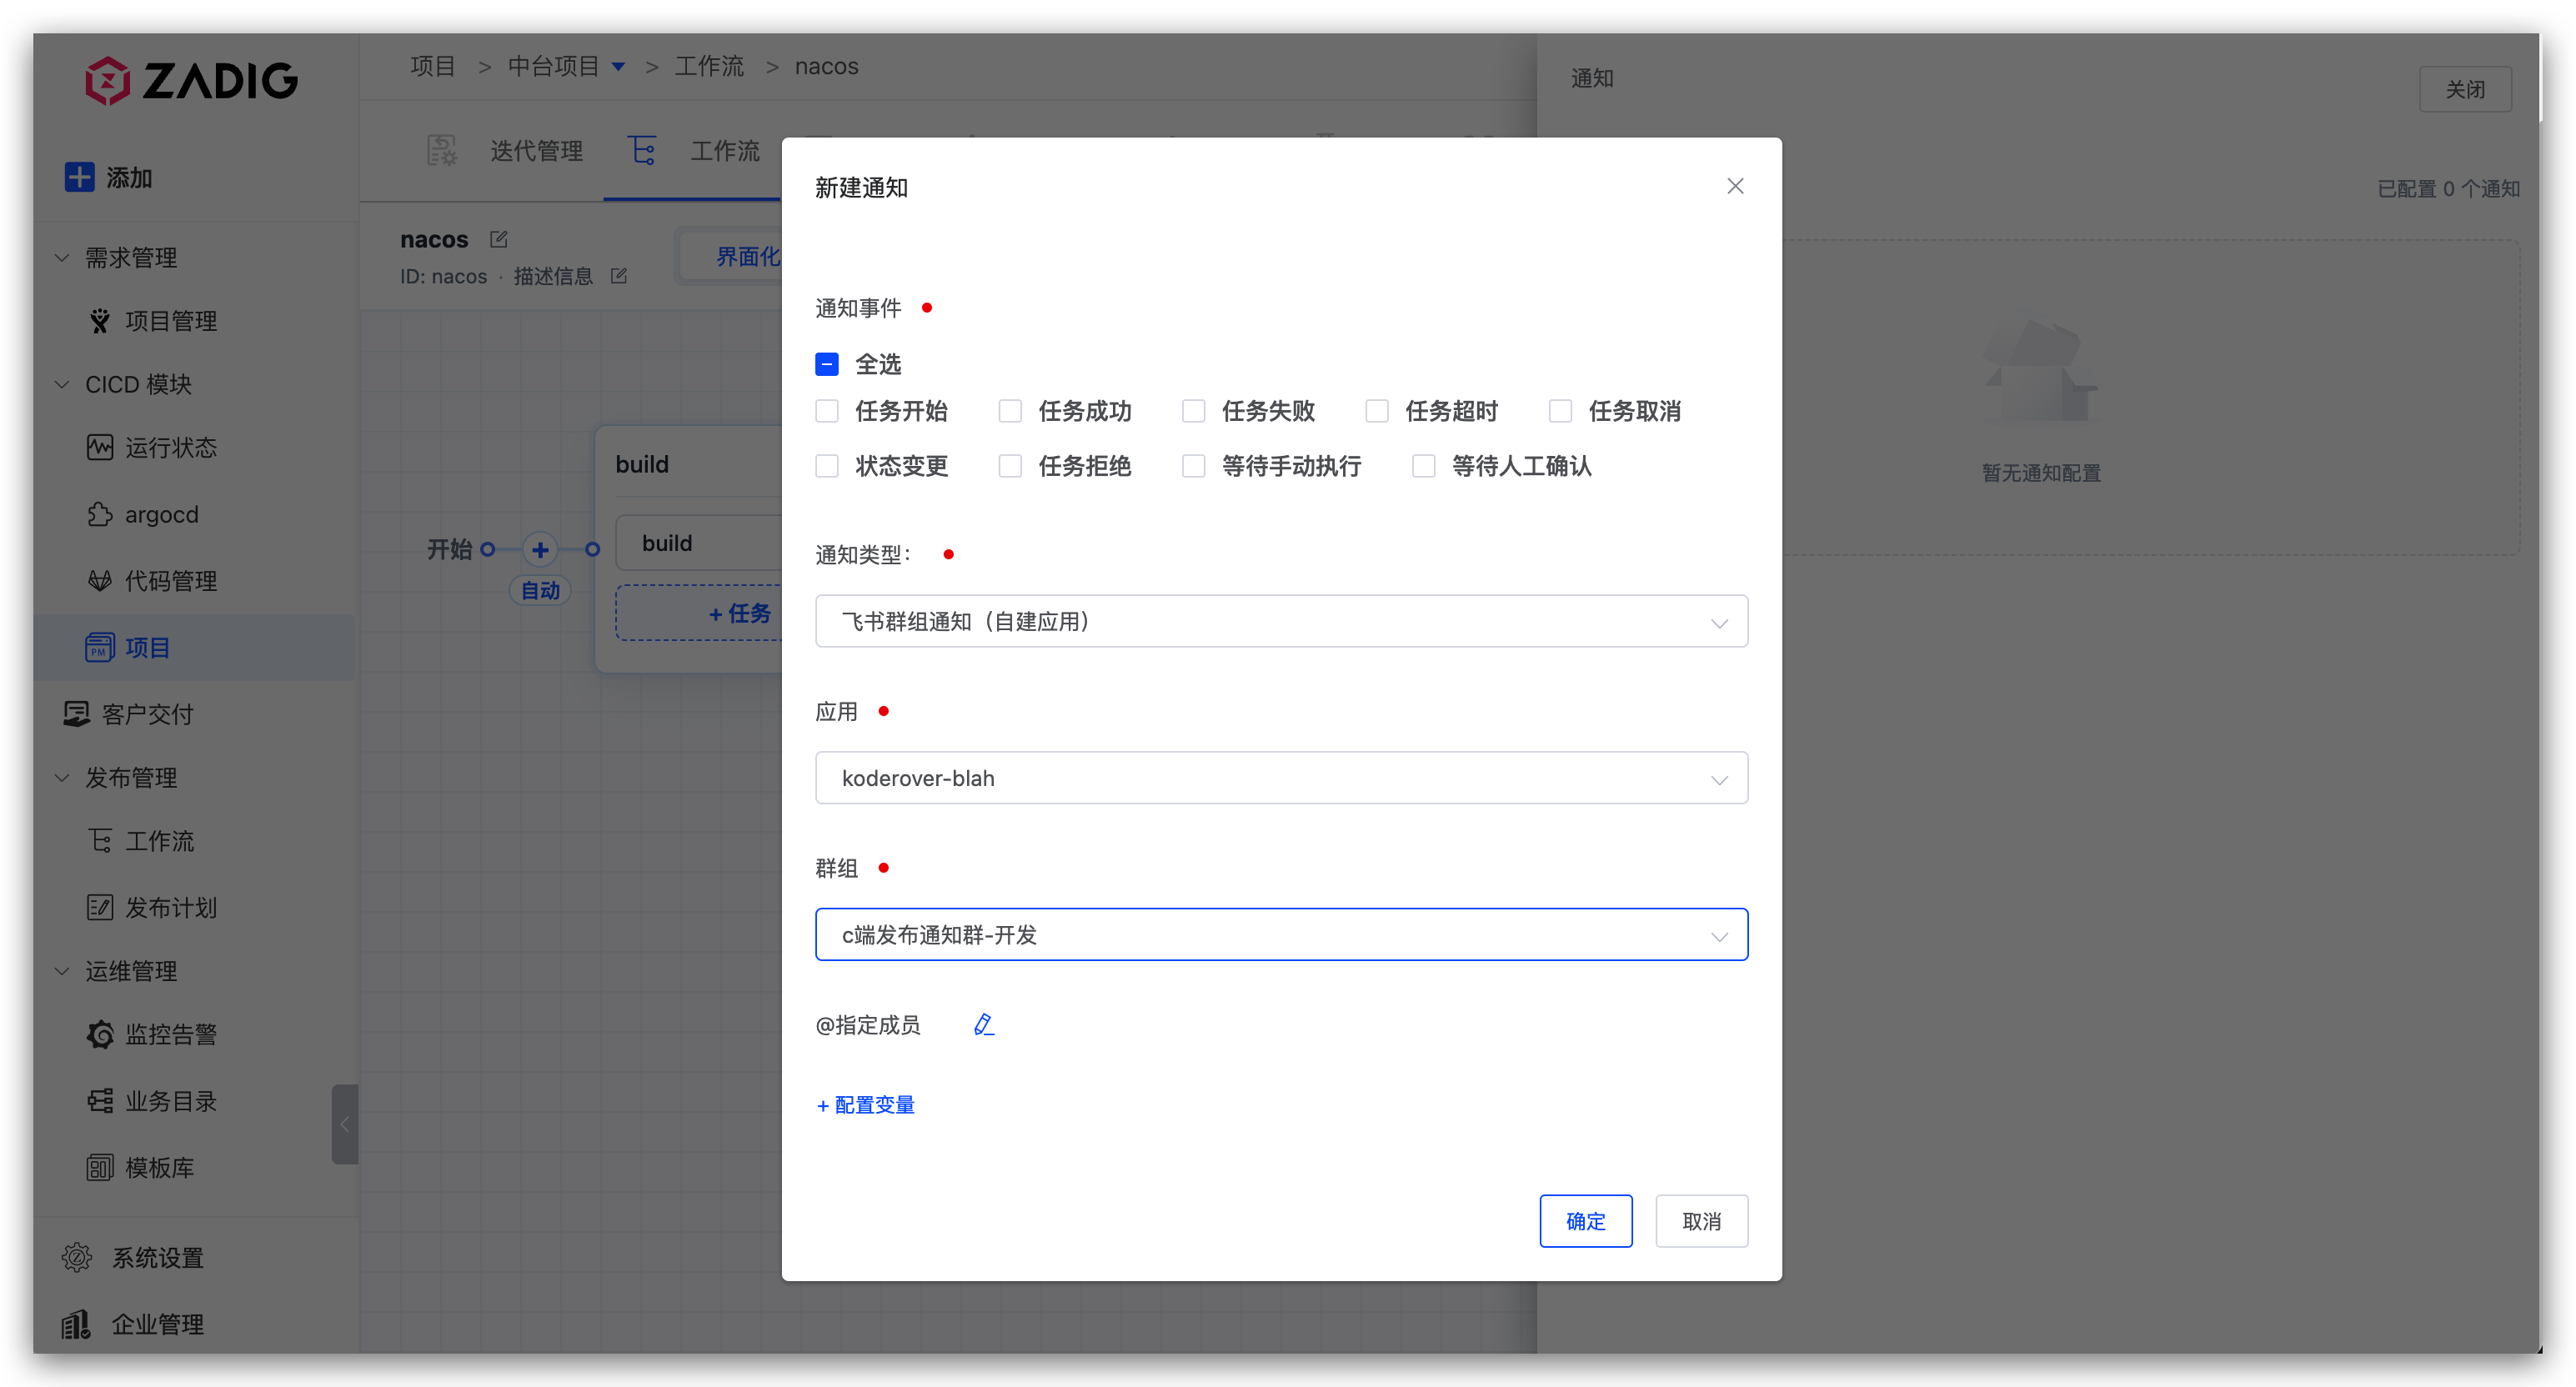
Parameter Description:
Notification Events: Configure the notification rules. Multiple workflow statuses can be selectedNotification Type: SelectFeishu Group Notification (Self-Built Application)Feishu App: The Feishu app configured in Step 1@Specific Members: If you want to notify specific individuals, select members, or specify notification targets via phone number/email/account variables. See Specify Notification Targets via Variables. Separate multiple users with;
# Notification Effect
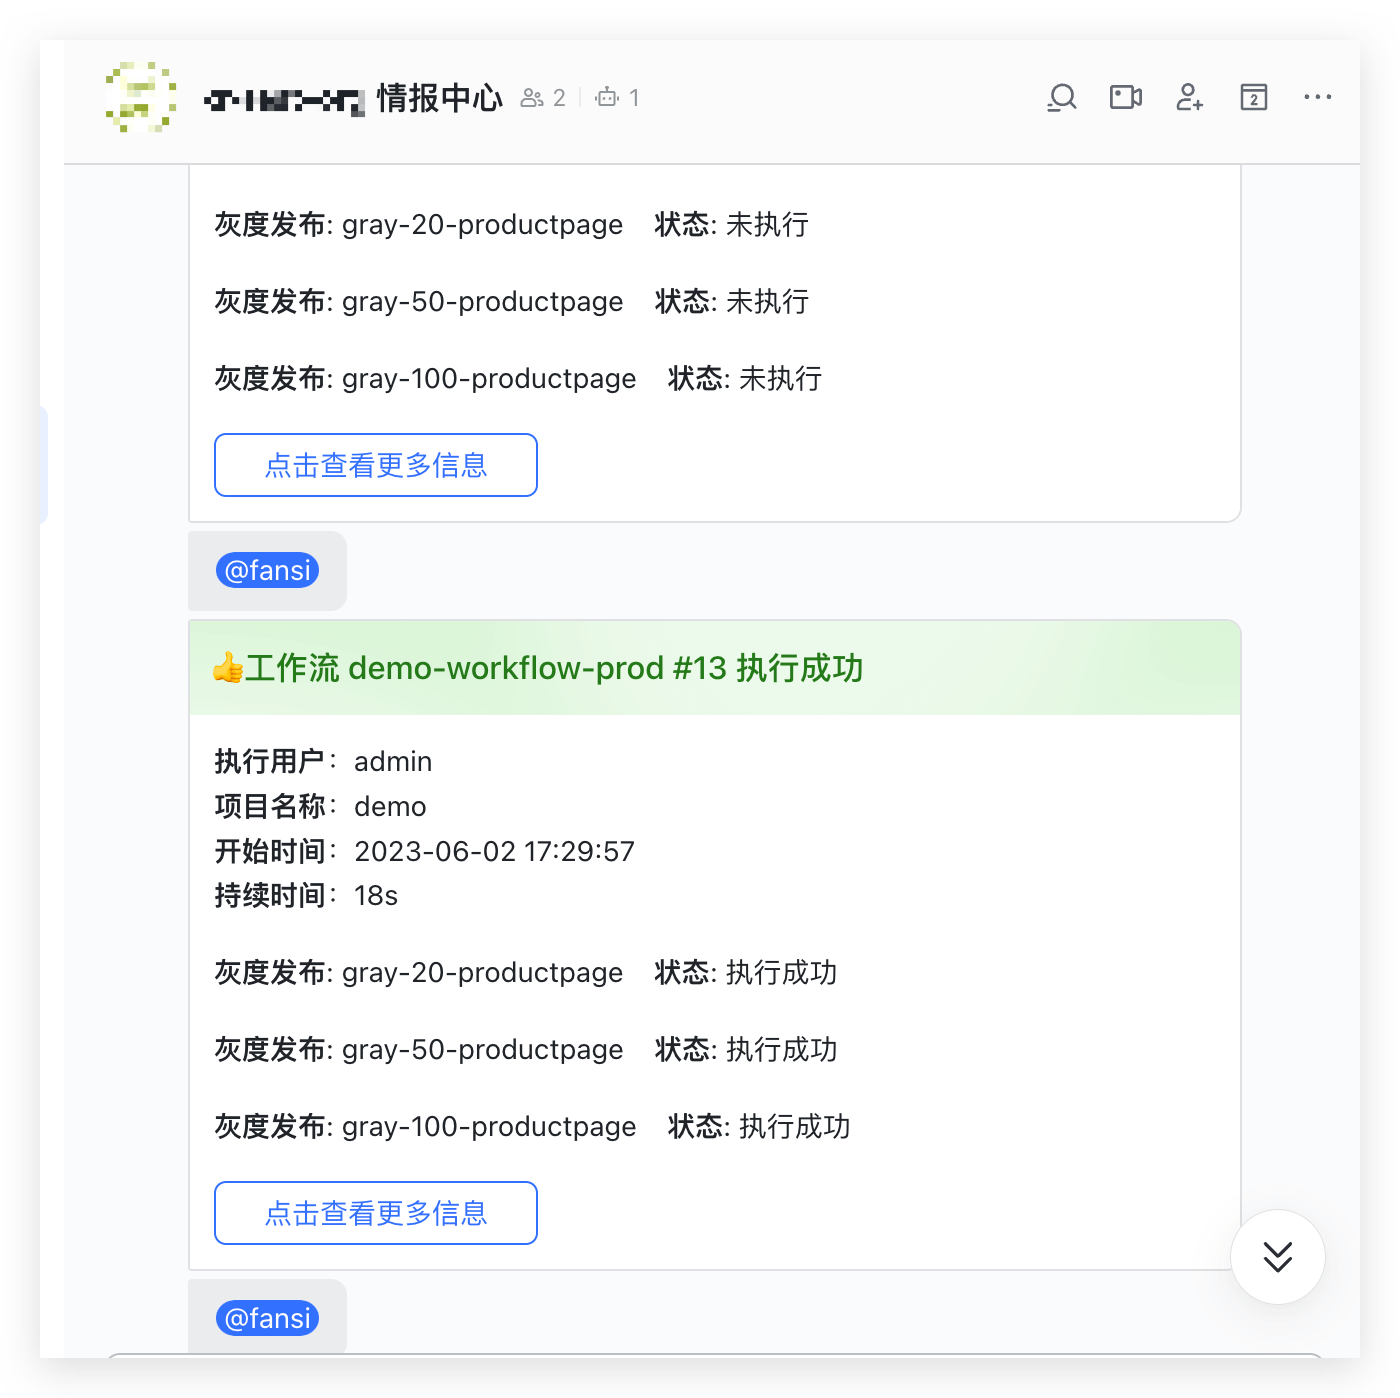
# Feishu Member Notification
# How to Configure
Step 1: Integrate Feishu IM on Zadig.
Step 2: Edit the workflow and add a Feishu member notification.
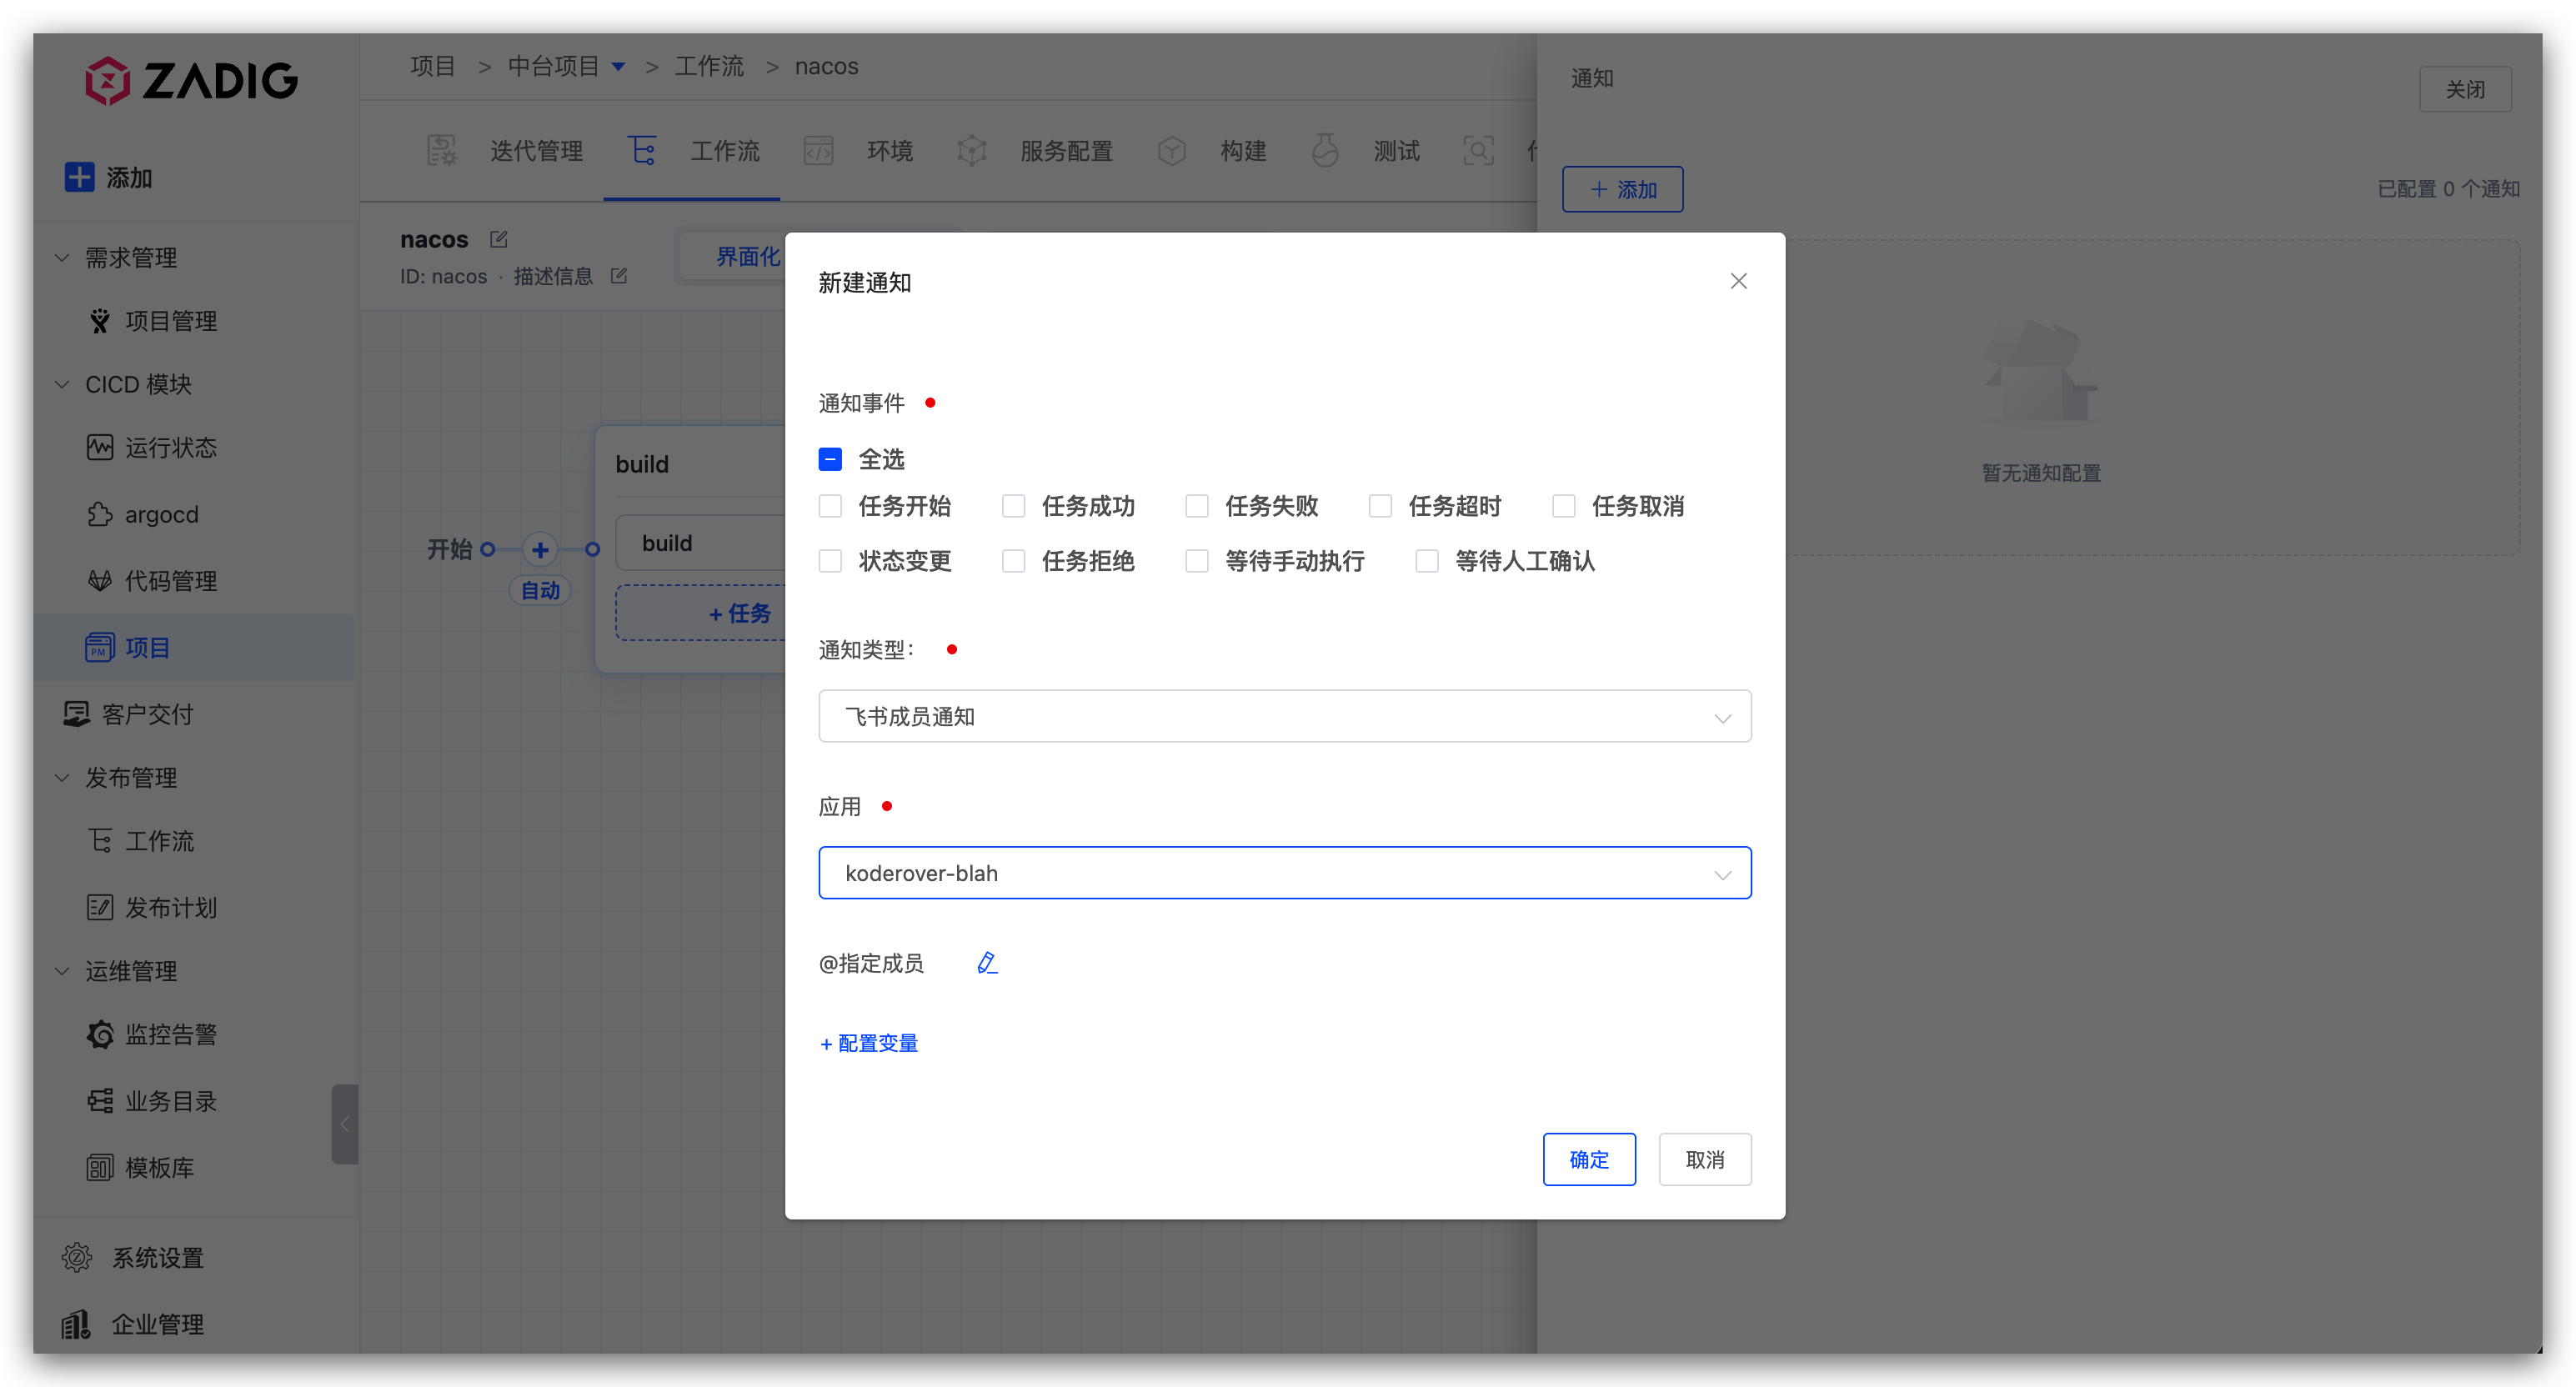
Parameter Description:
Notification Events: Configure the notification rules. Multiple workflow statuses can be selectedNotification Type: SelectFeishu Member NotificationFeishu App: The Feishu app configured in Step 1@Specific Members: If you want to notify specific individuals, select members, or specify notification targets via phone number/email/account variables. See Specify Notification Targets via Variables. Separate multiple users with;
# Notification Effect
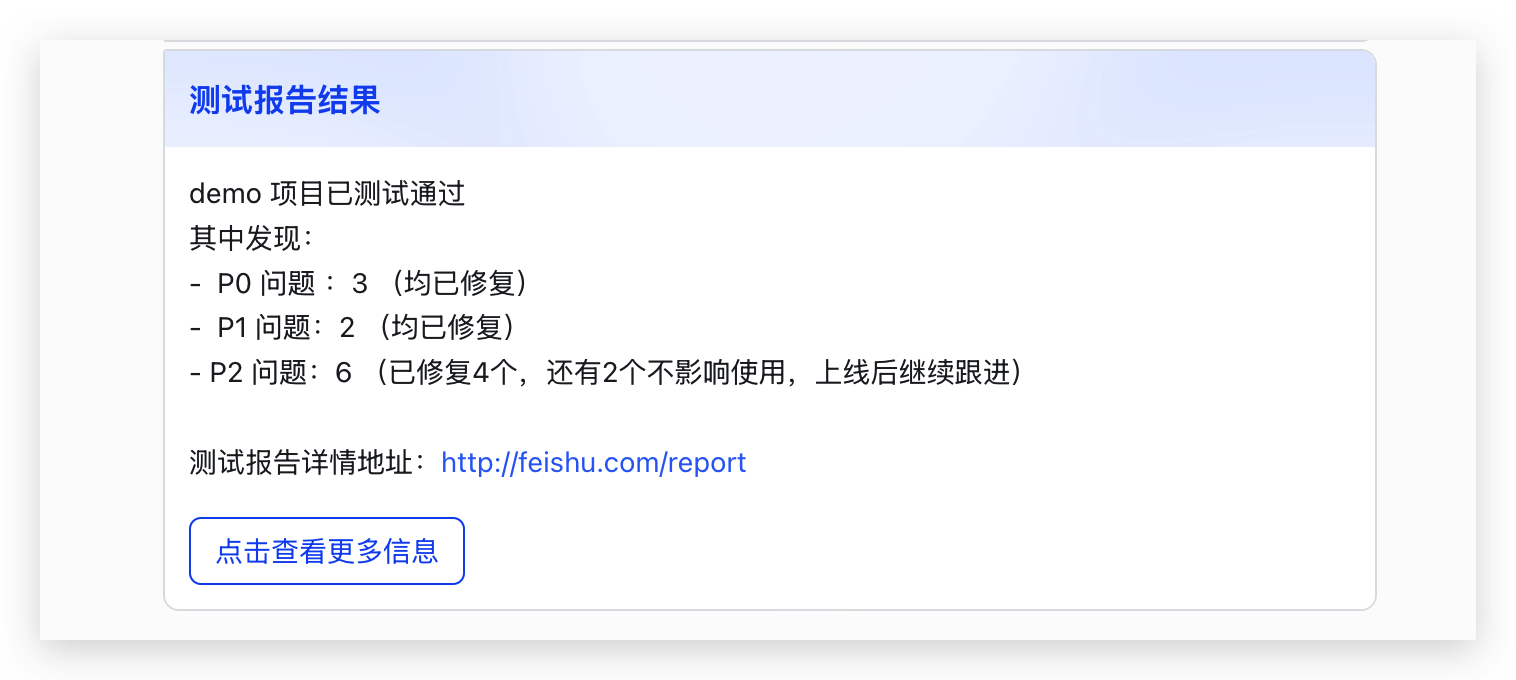
# DingTalk
# How to Configure
Step 1: Configure a DingTalk custom robot and obtain the Webhook address. Refer to Add DingTalk Custom Robot(opens new window).
Tip
When configuring a custom robot in DingTalk, if the security setting is specified as Custom Keyword, configure the keyword as Workflow.
Step 2: Edit the workflow and add a DingTalk notification.
Parameter Description:
Notification Events: Configure the notification rules. Multiple workflow statuses can be selectedNotification Type: SelectDingTalkWebhook Address: The Webhook address obtained in Step 1@Specific Members: If you want to notify specific individuals, enter the mobile phone numbers of the corresponding DingTalk users, or specify notification targets via phone number/email/account variables. See Specify Notification Targets via Variables. Separate multiple users with;
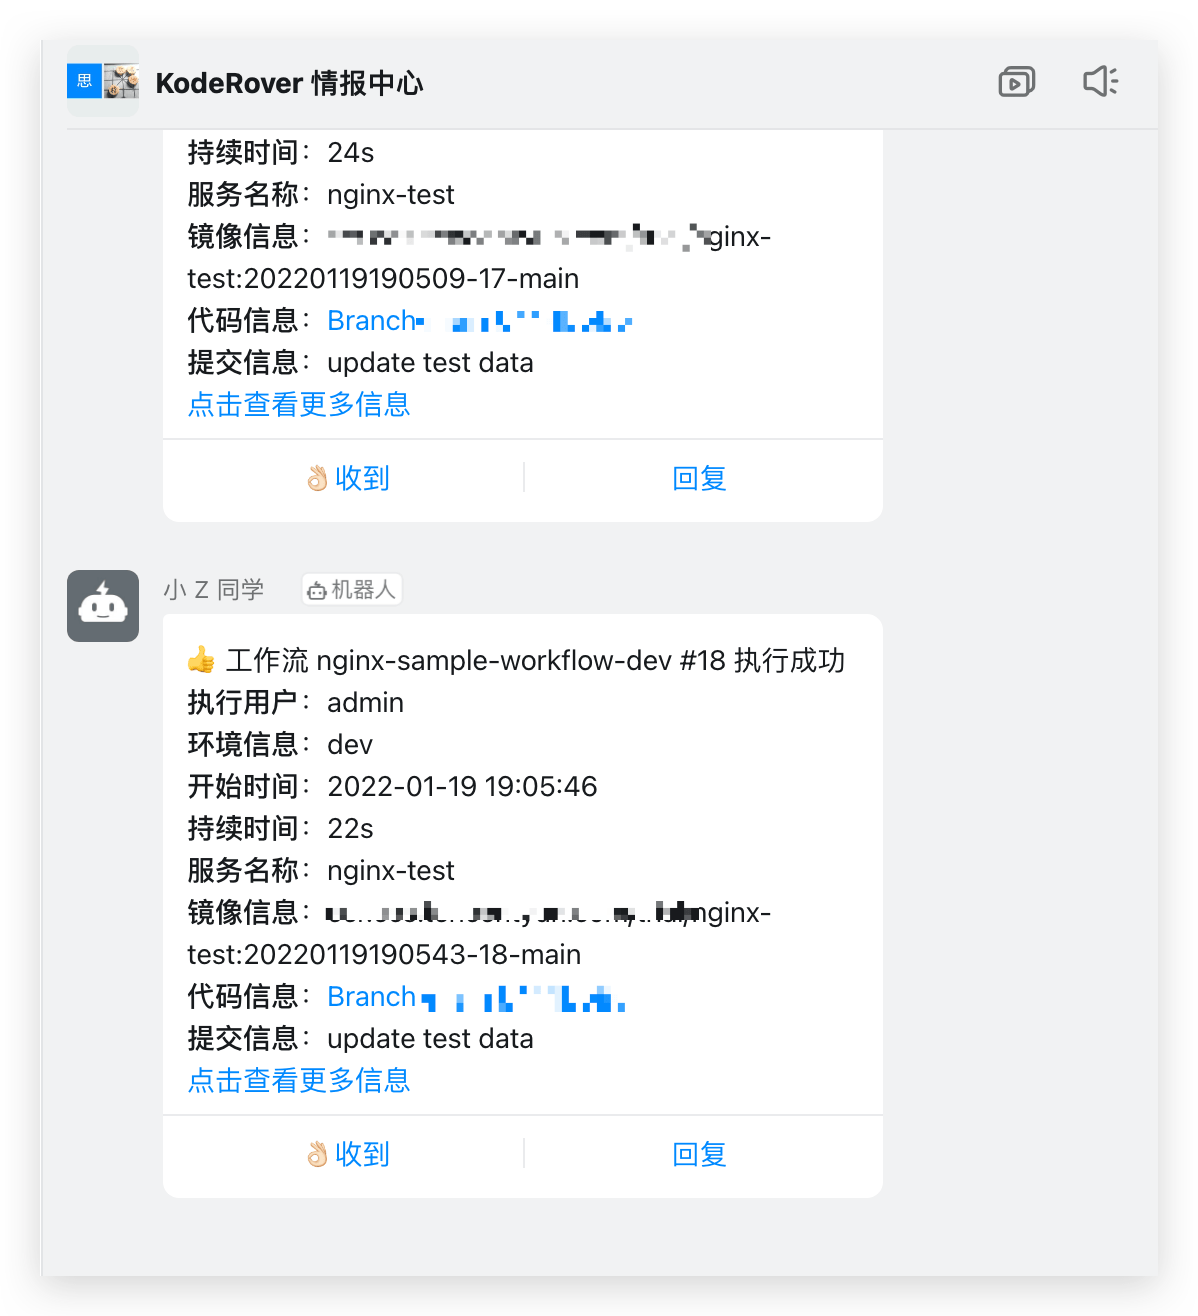
# Notification Effect
# Enterprise WeChat
# How to Configure
Step 1: Add an Enterprise WeChat group robot and obtain the Webhook address. Refer to How to Set Up Enterprise WeChat Group Robot(opens new window).
Step 2: Edit the workflow and add an Enterprise WeChat notification.
Parameter Description:
Notification Type: SelectEnterprise WeChatWebhook Address: The Webhook address obtained in Step 1@Specific Members: If you want to notify specific individuals, enter the corresponding user's user_id, separated by;for multiple usersNotification Events: Configure the notification rules. Multiple workflow statuses can be selected
Refer to How to Obtain a Member's UserID(opens new window) to obtain user_id
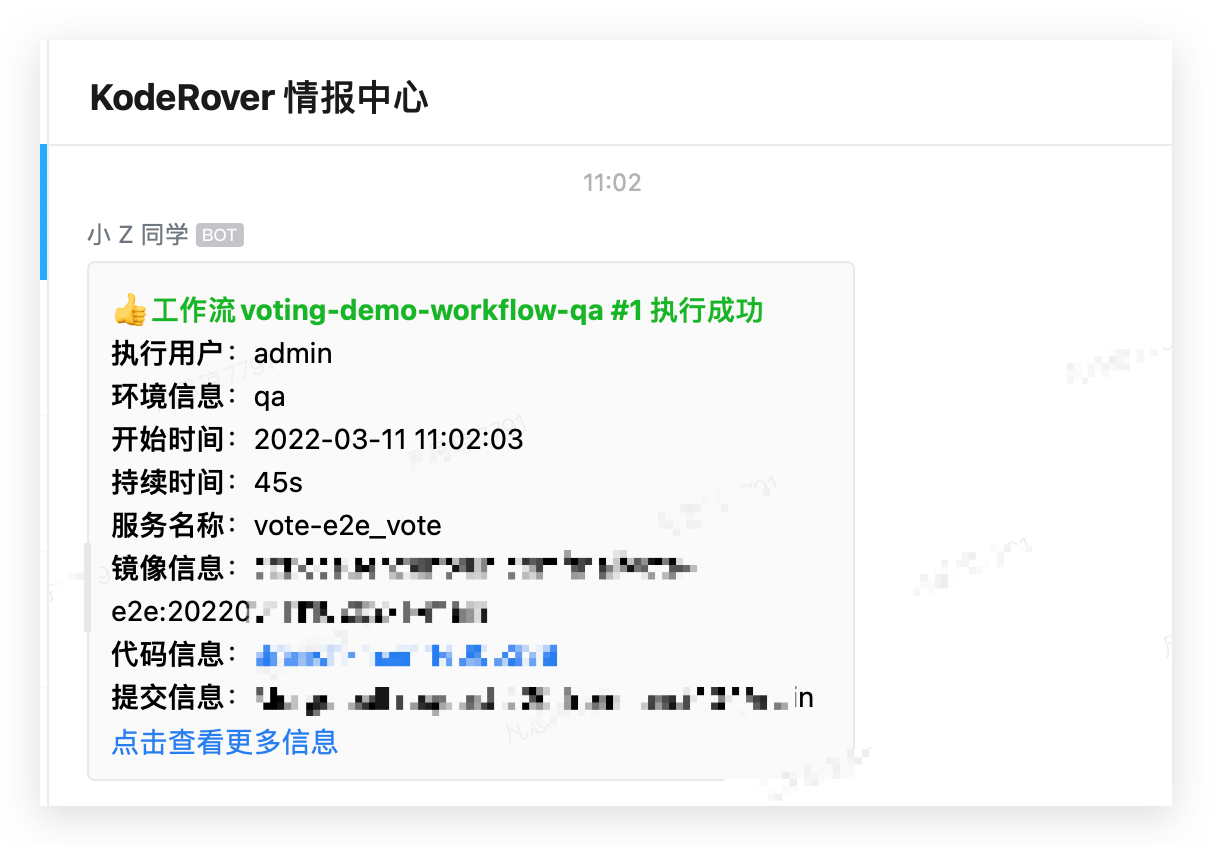
# Notification Effect
# Microsoft Teams
# How to Configure
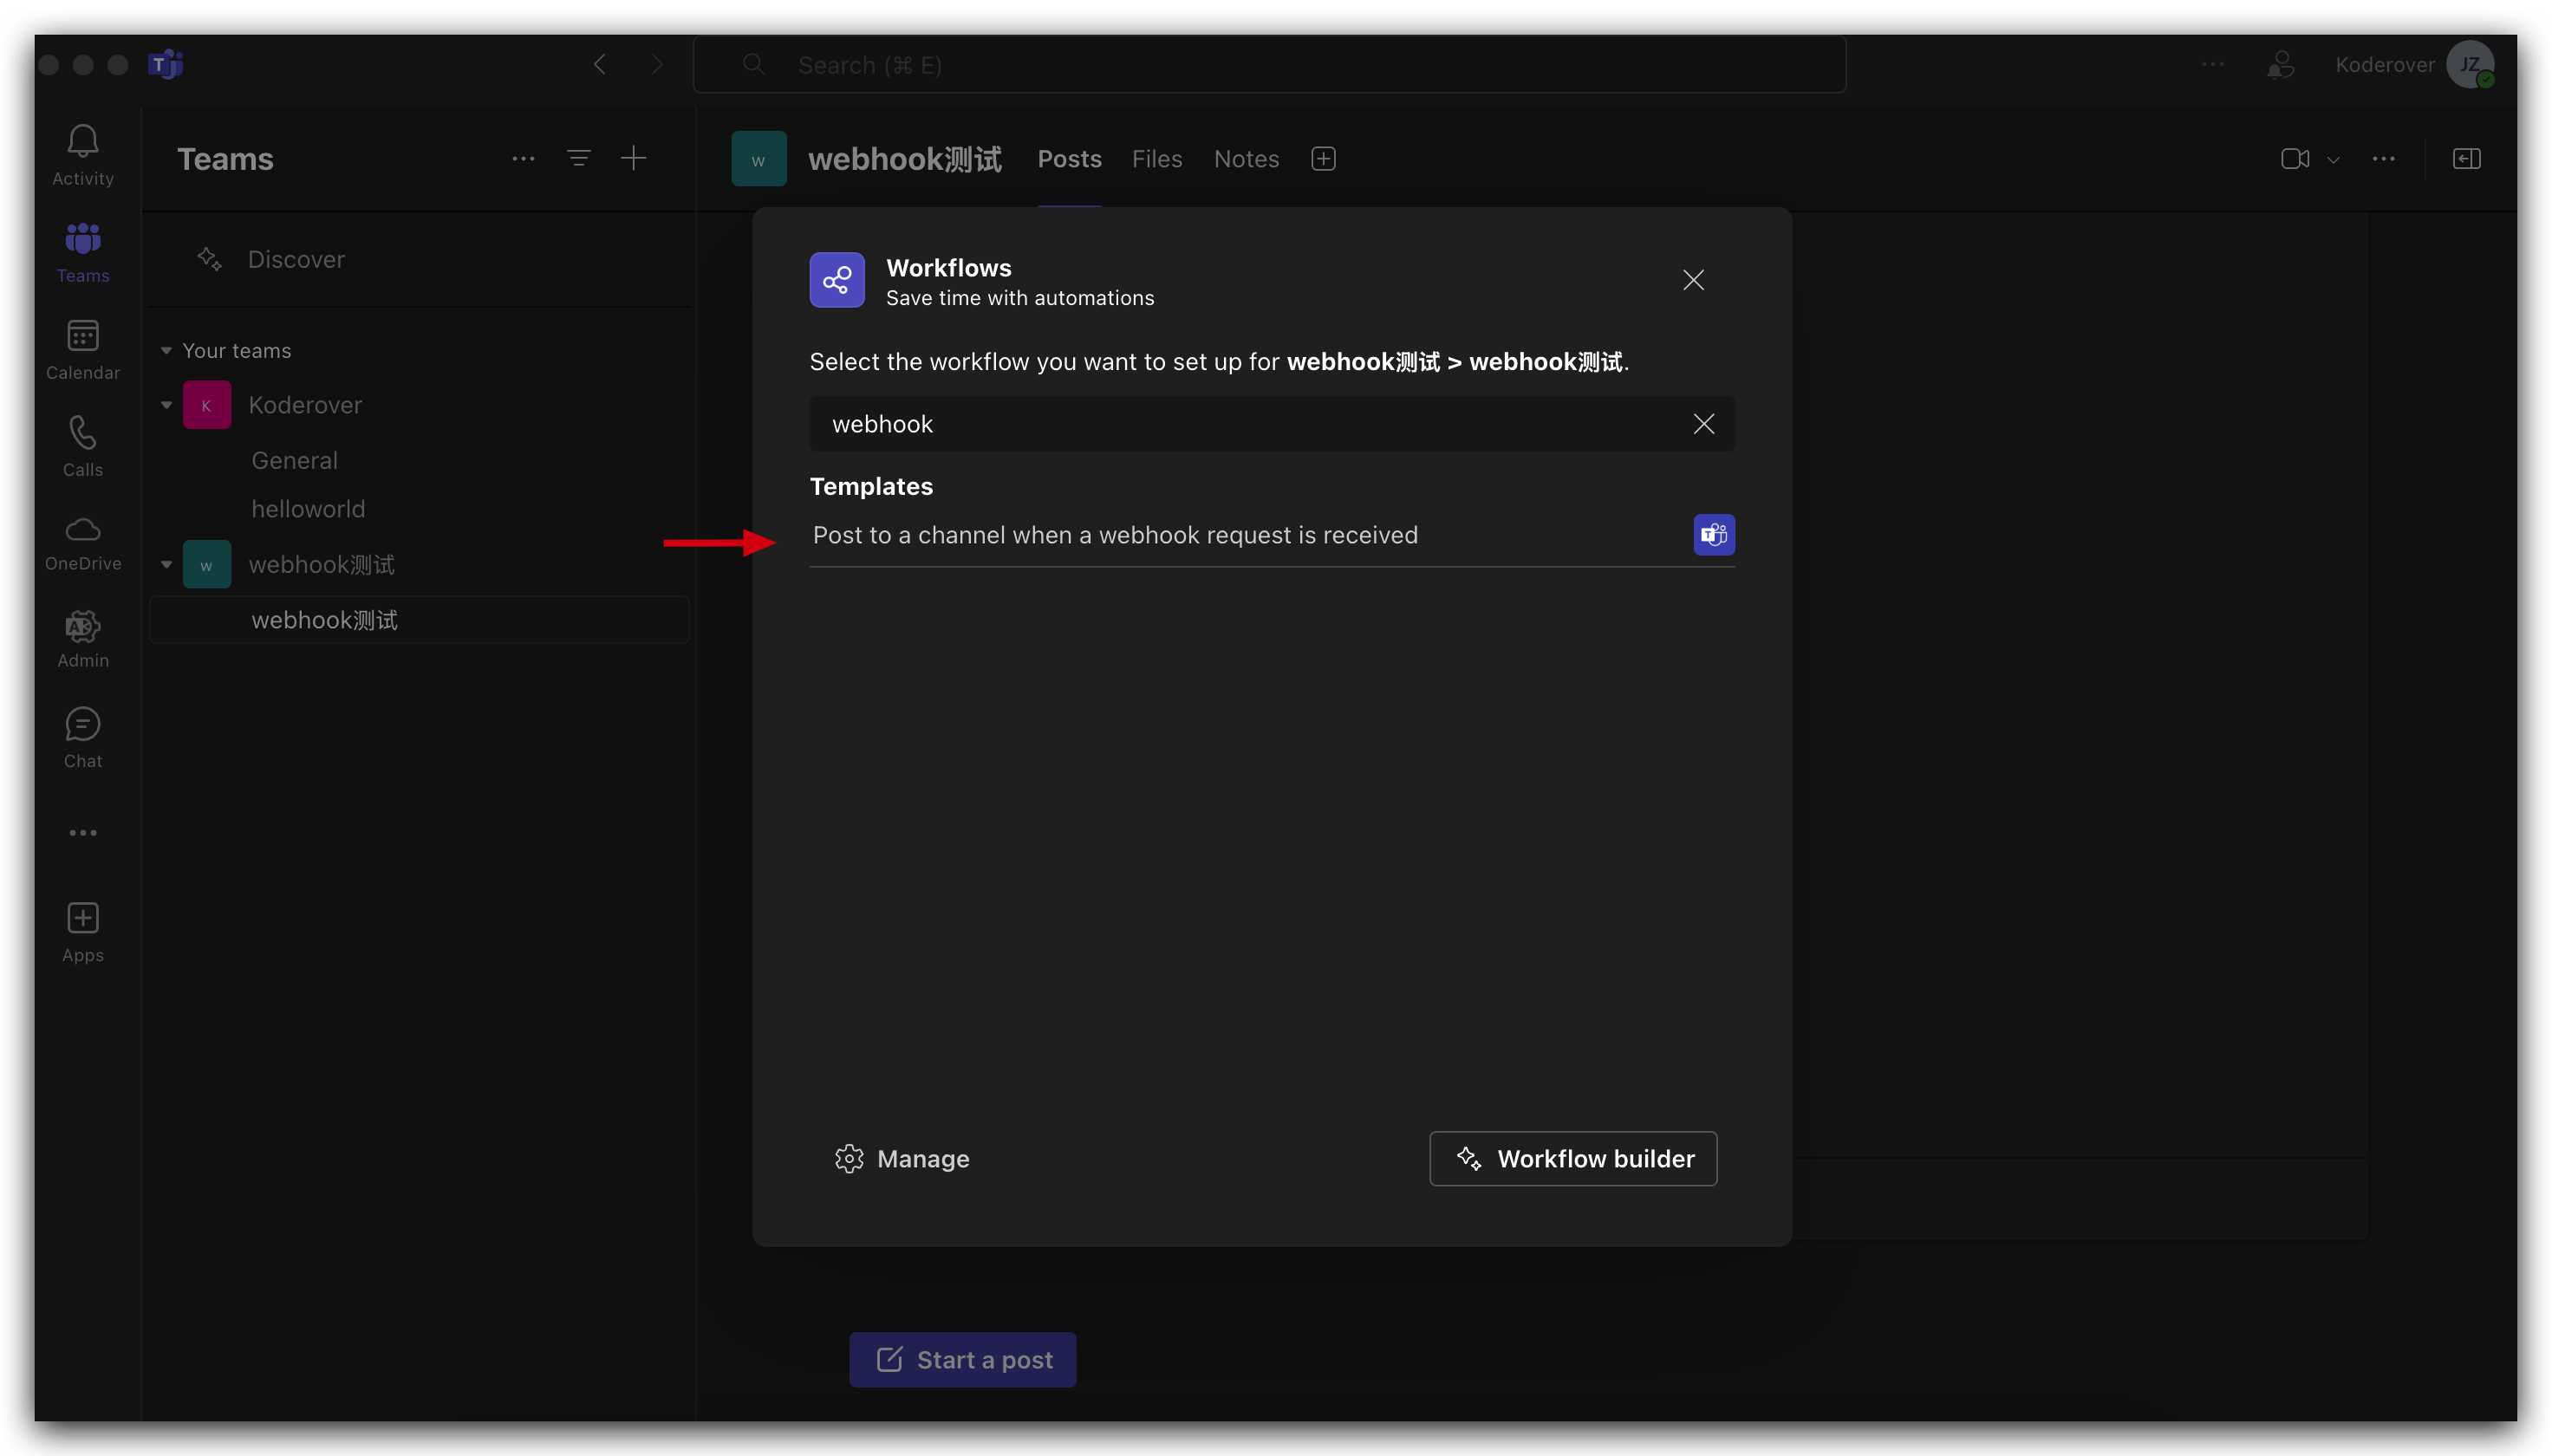
Step 1: In the Teams Workflows App, create a workflow based on the "Post to a channel when a webhook request is received" template. Refer to the Teams Official Documentation(opens new window)
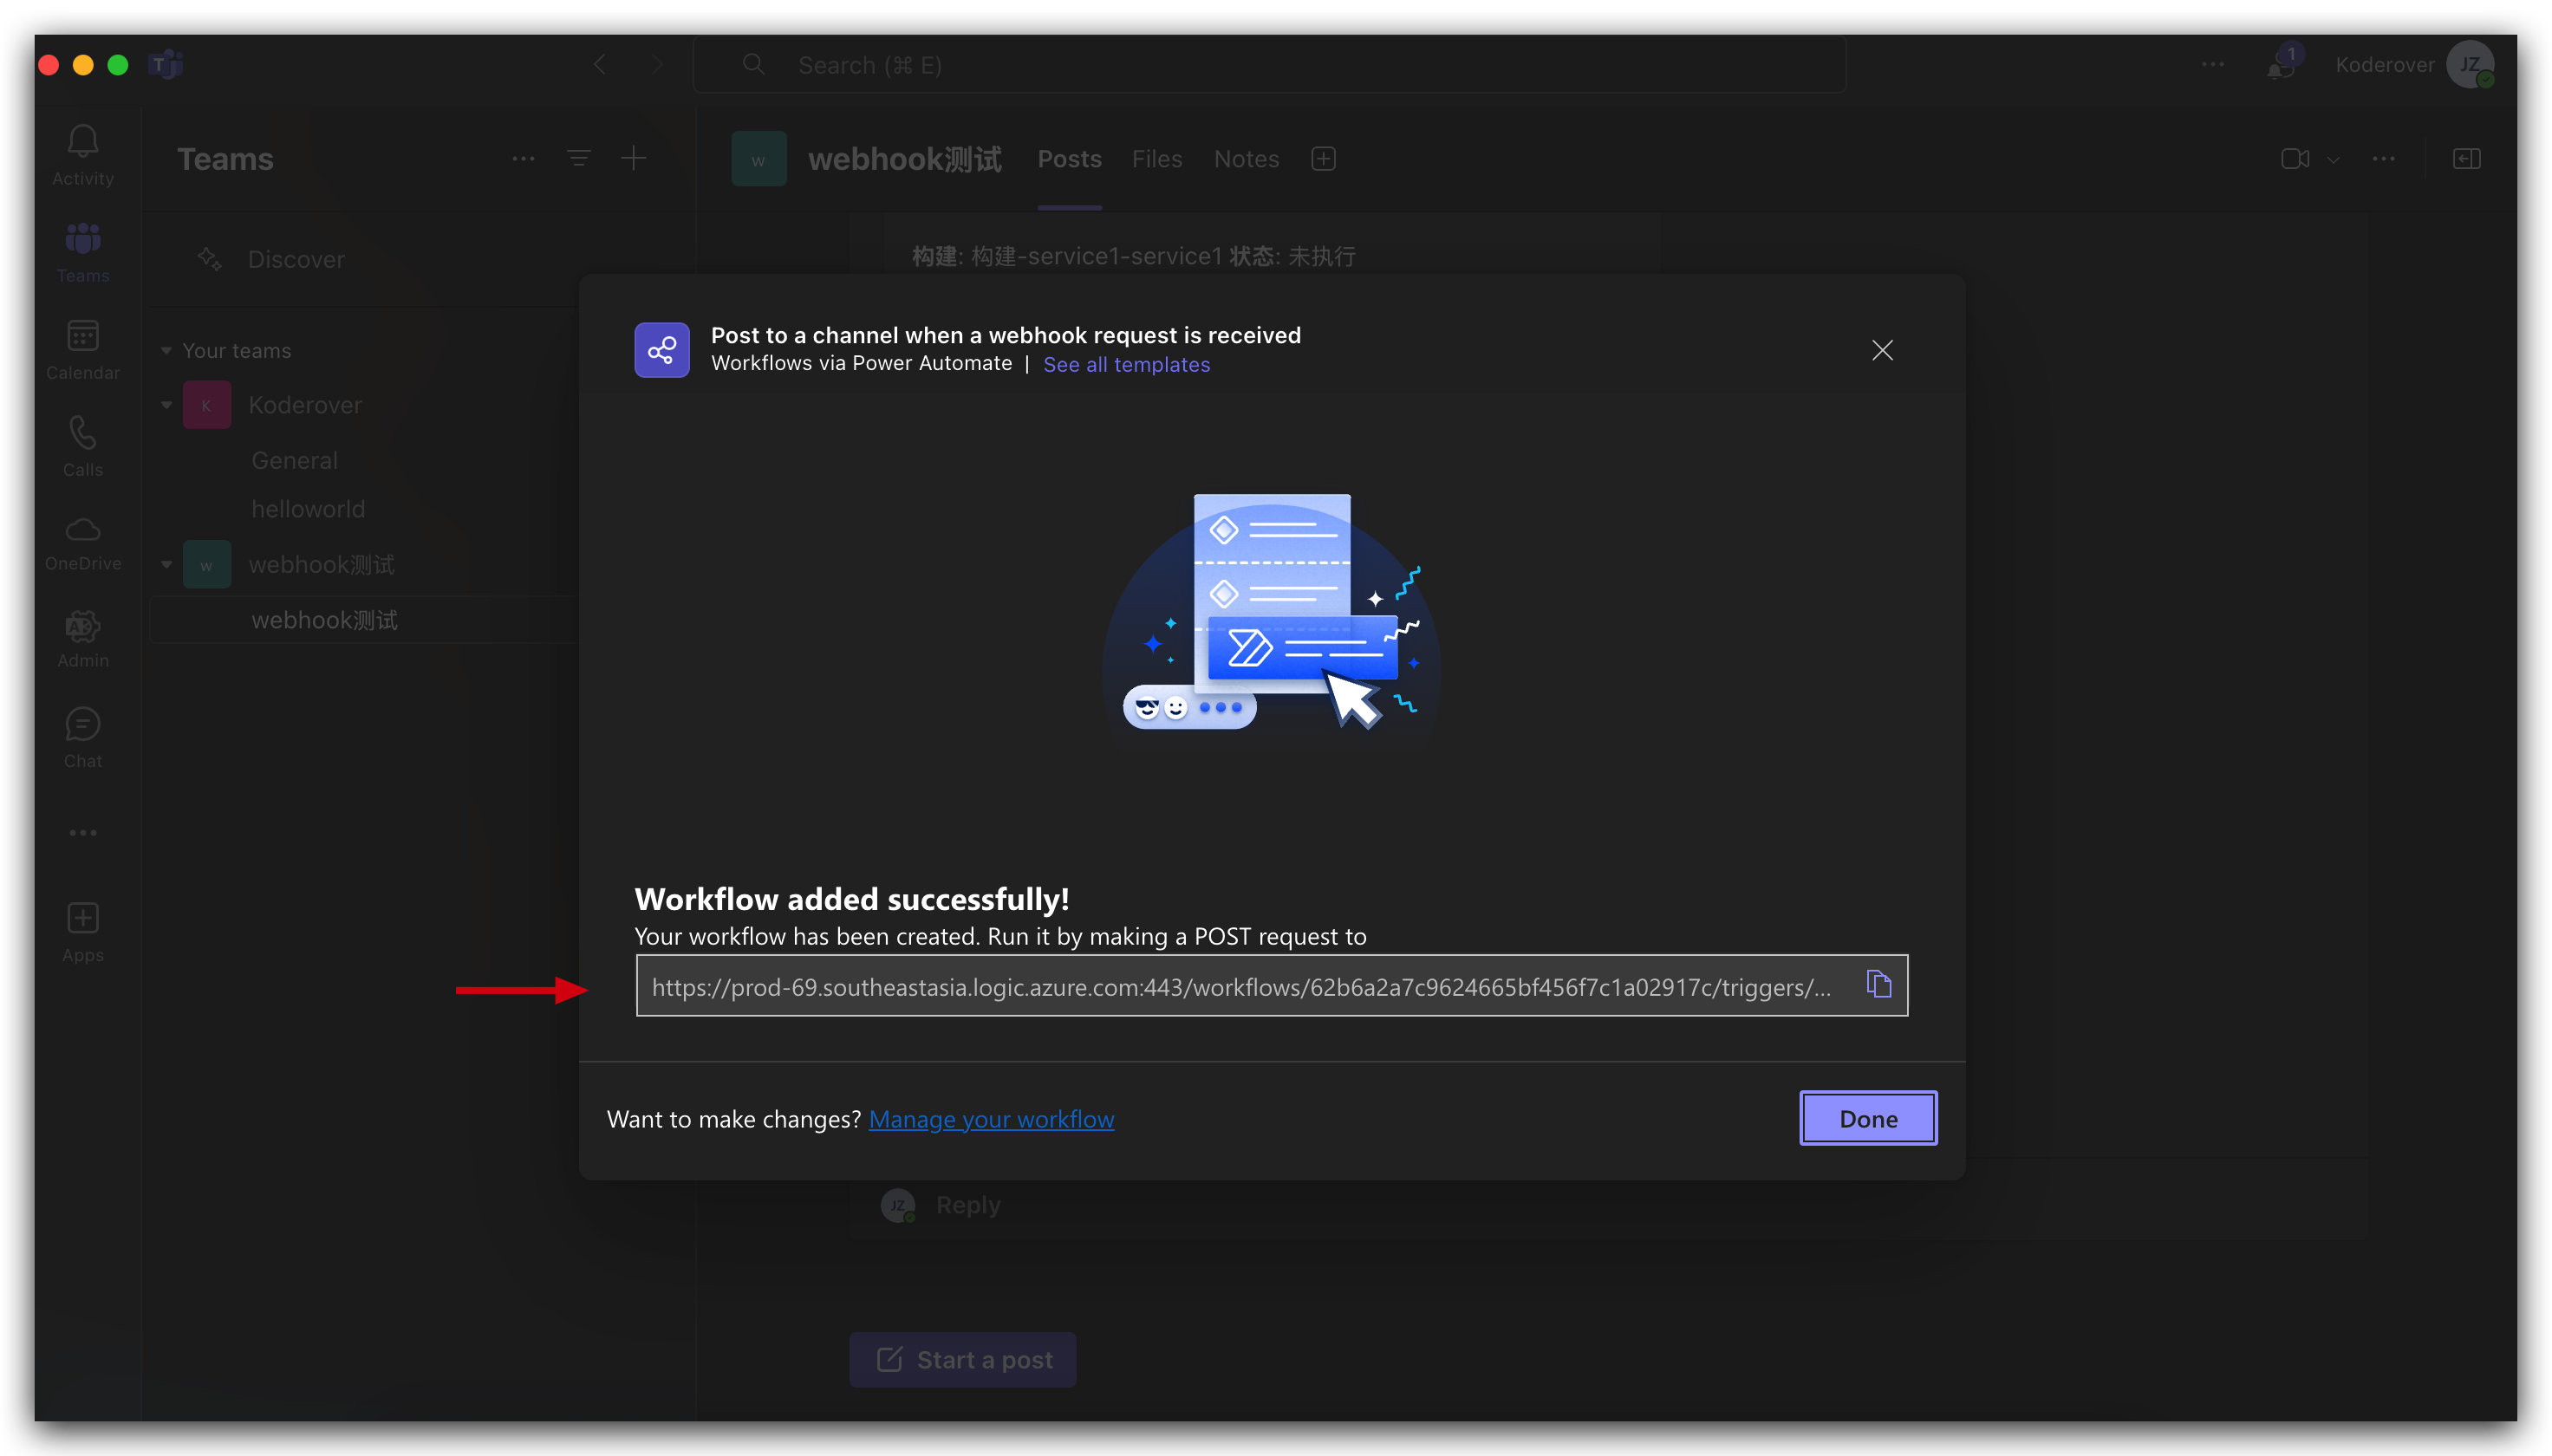
Step 2: After successful creation, obtain the Webhook address.
Step 3: Edit the workflow and add a Teams notification.
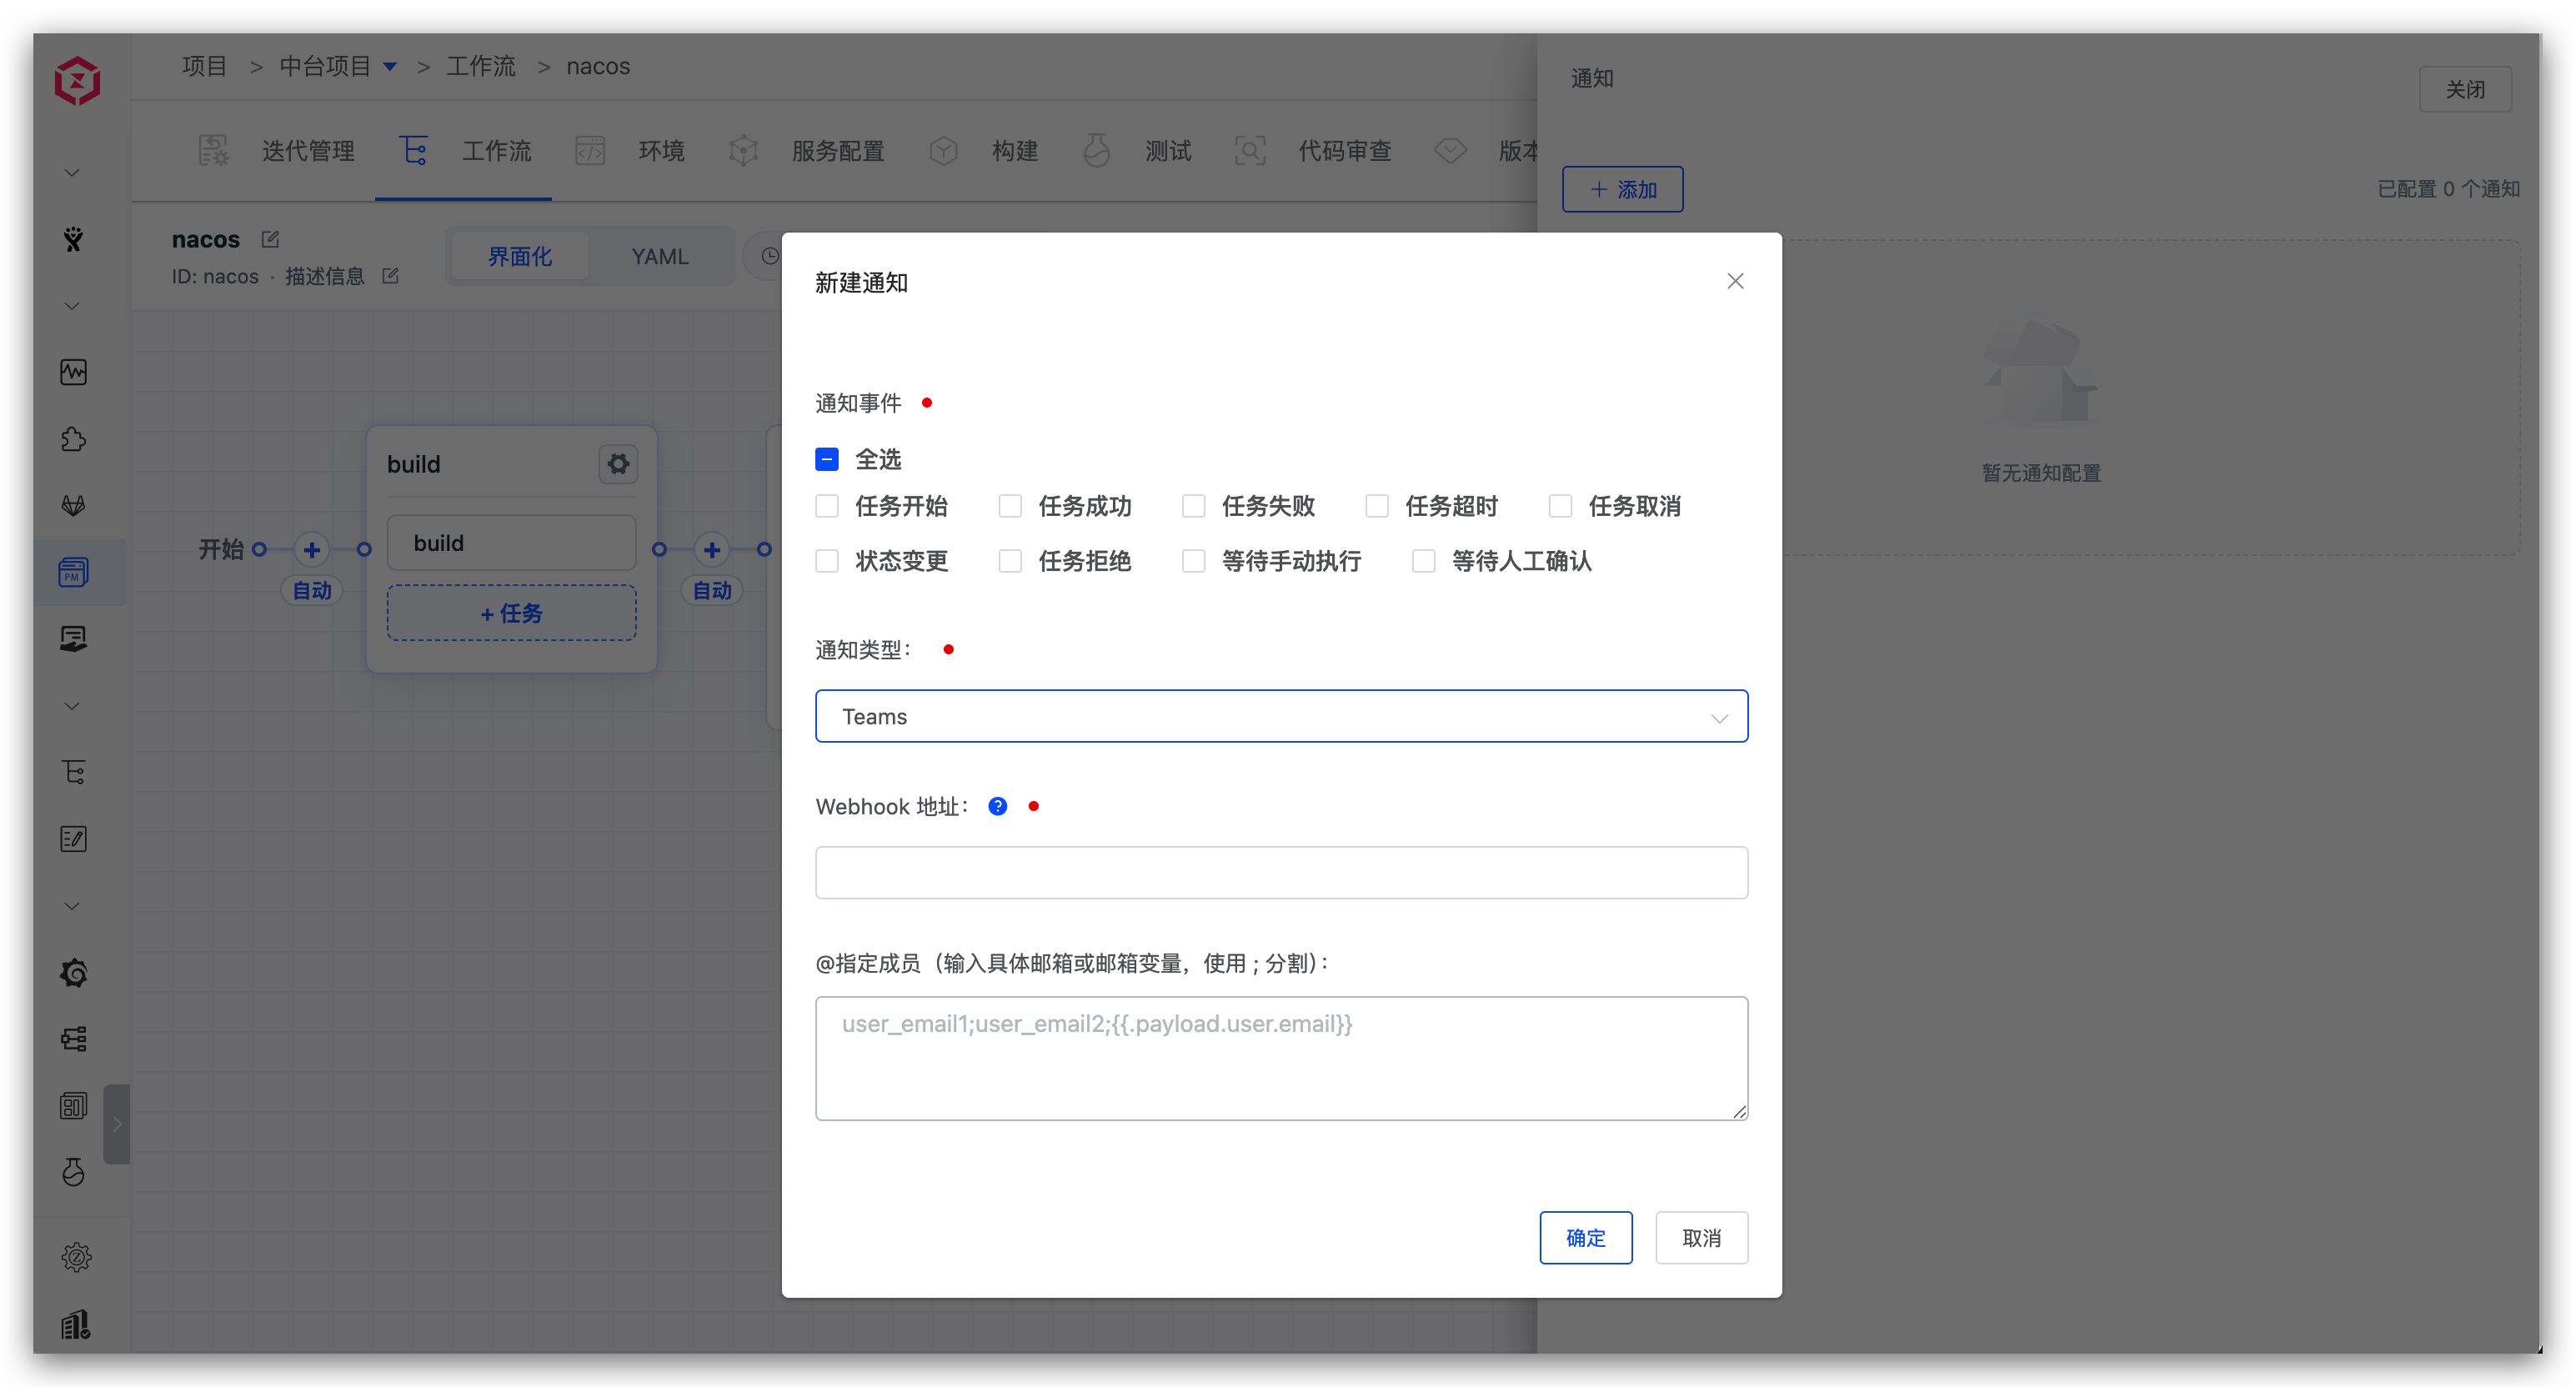
Parameter Description:
Webhook Address: The Webhook address obtained in Step 2.Specific Members: If you want to at specific individuals, enter the email addresses of the corresponding Teams users, or specify notification targets via email variables. See Specify Notification Targets via Variables. Separate multiple users with;
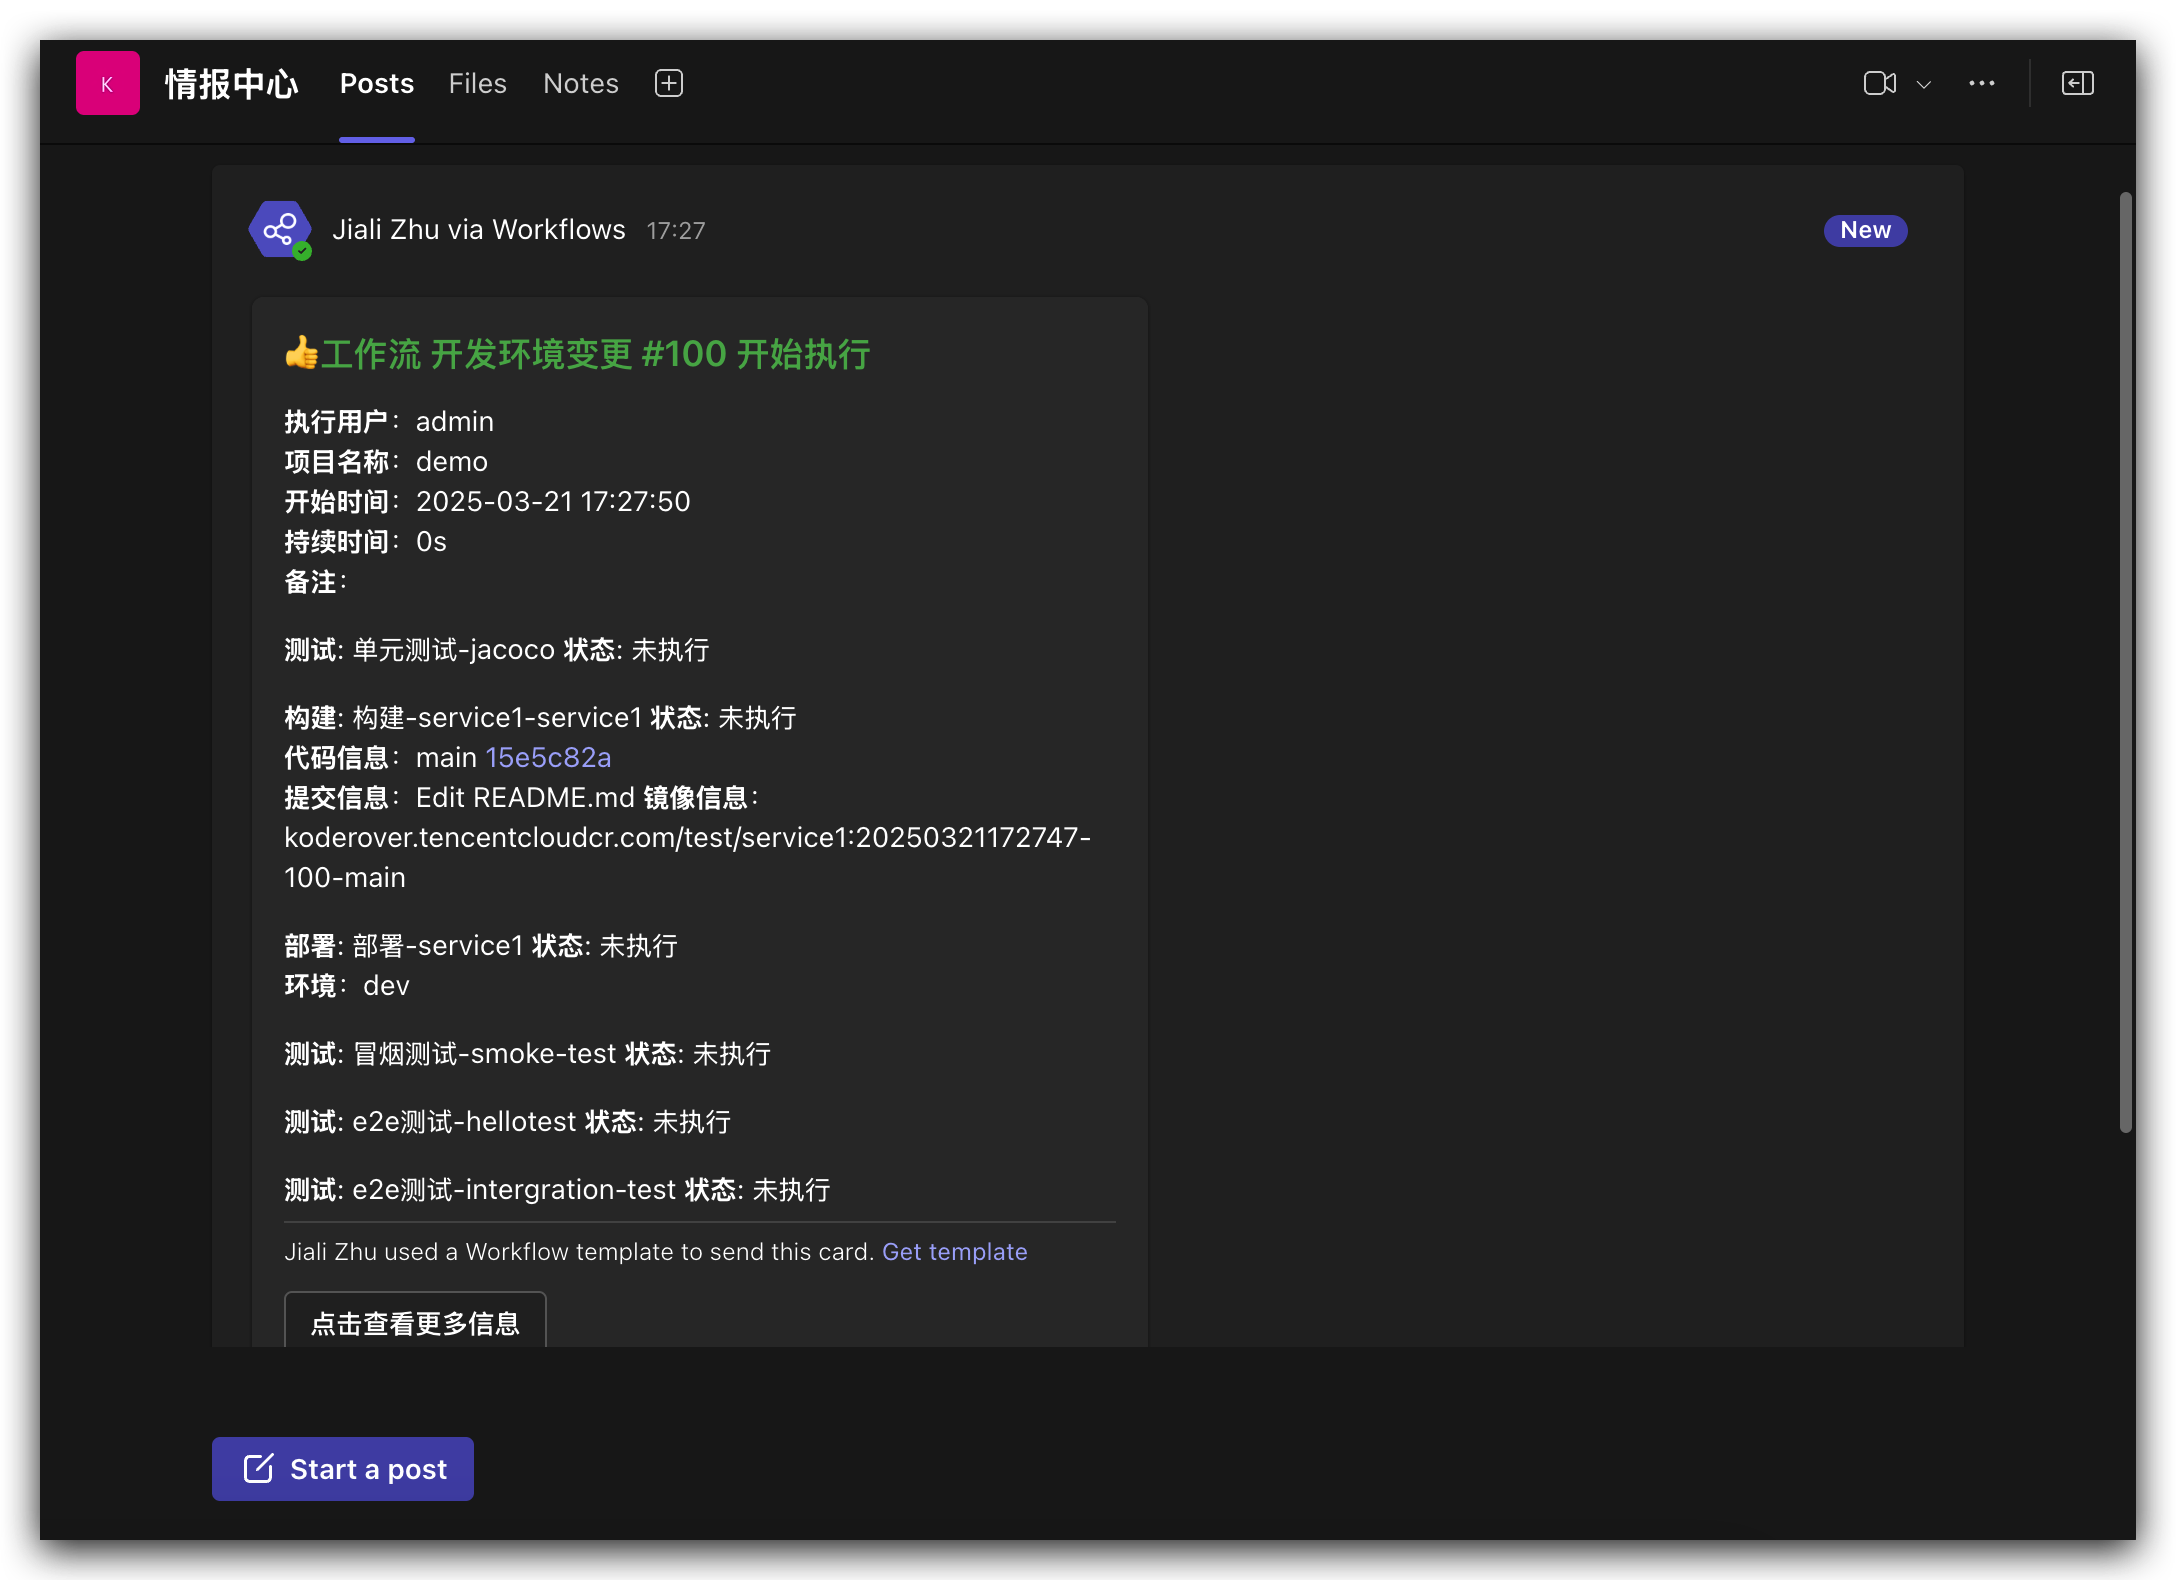
# Notification Effect
# How to Configure
Step 1: The system administrator goes to "System Settings" -> "System Configuration" -> "Mail Configuration" to configure the sending mail server. For specific configuration, refer to Email Configuration.
Step 2: Edit the workflow and add an email notification.
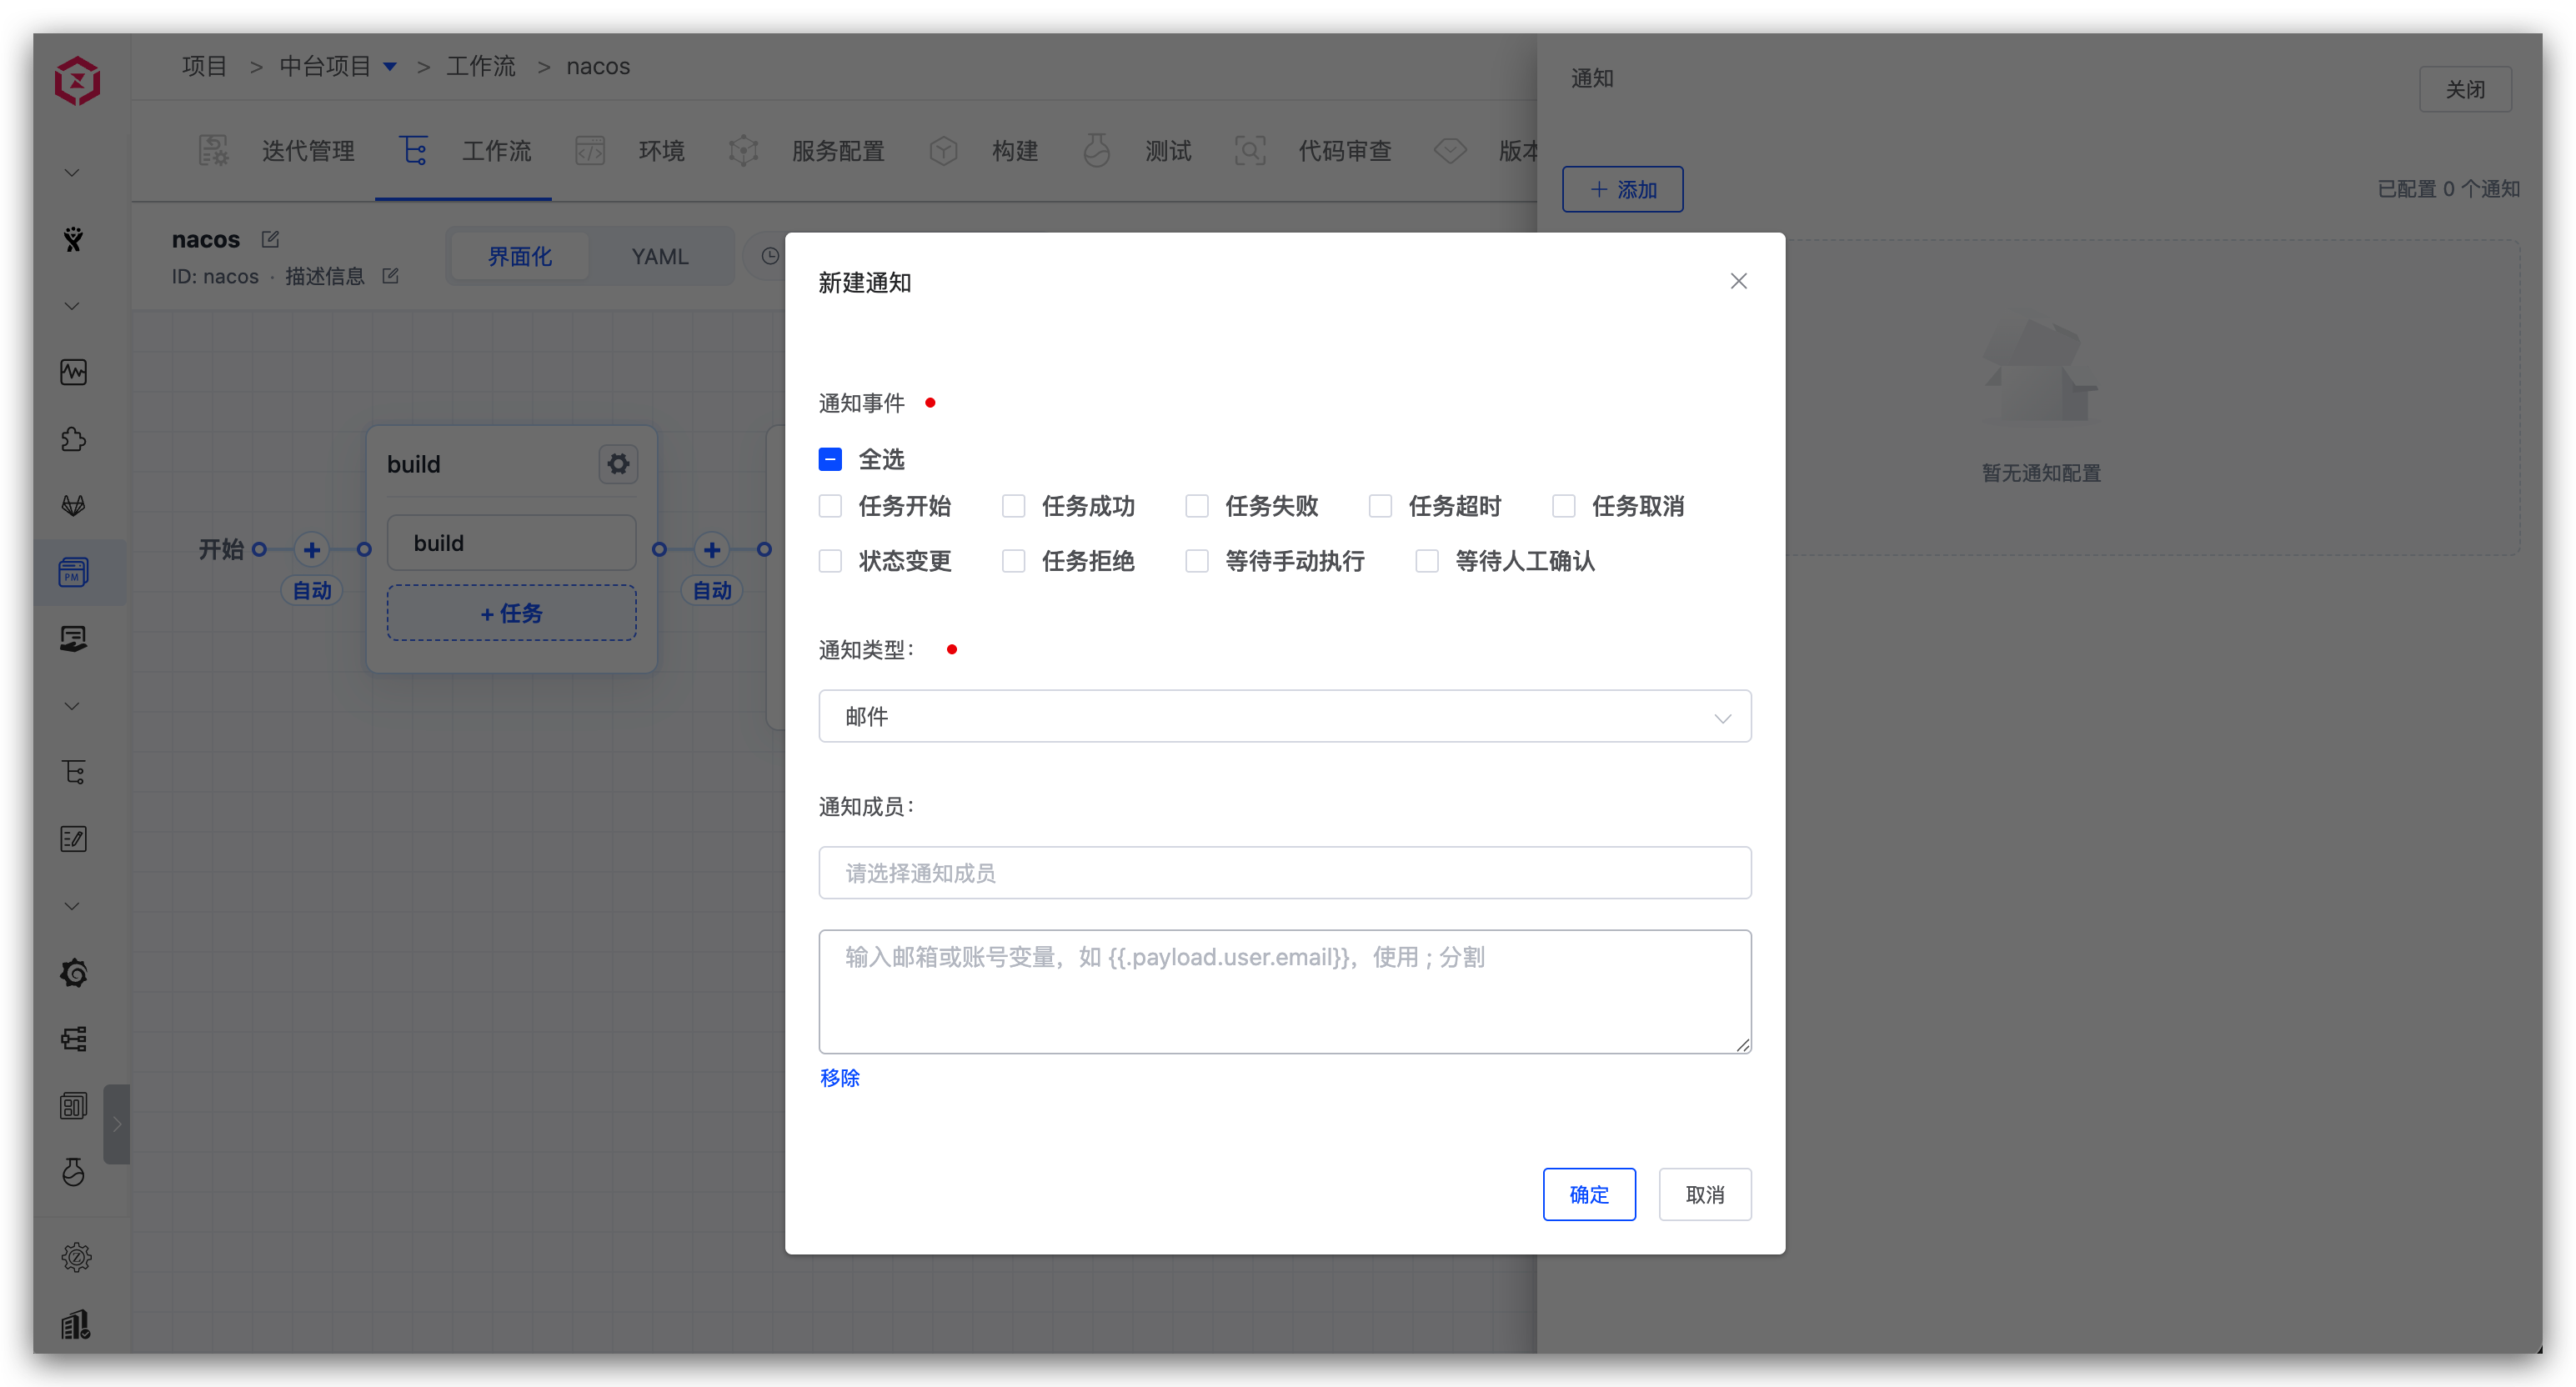
Parameter Description:
Notification Members: You can select the workflow executor/stage executor, user, user group, or specify notification targets by entering email/account variables. See Specify Notification Targets via Variables. Make sure that the notification member has configured a personal email in "Account Settings".Notification Events: Configure the notification rules. Multiple workflow statuses can be selected.
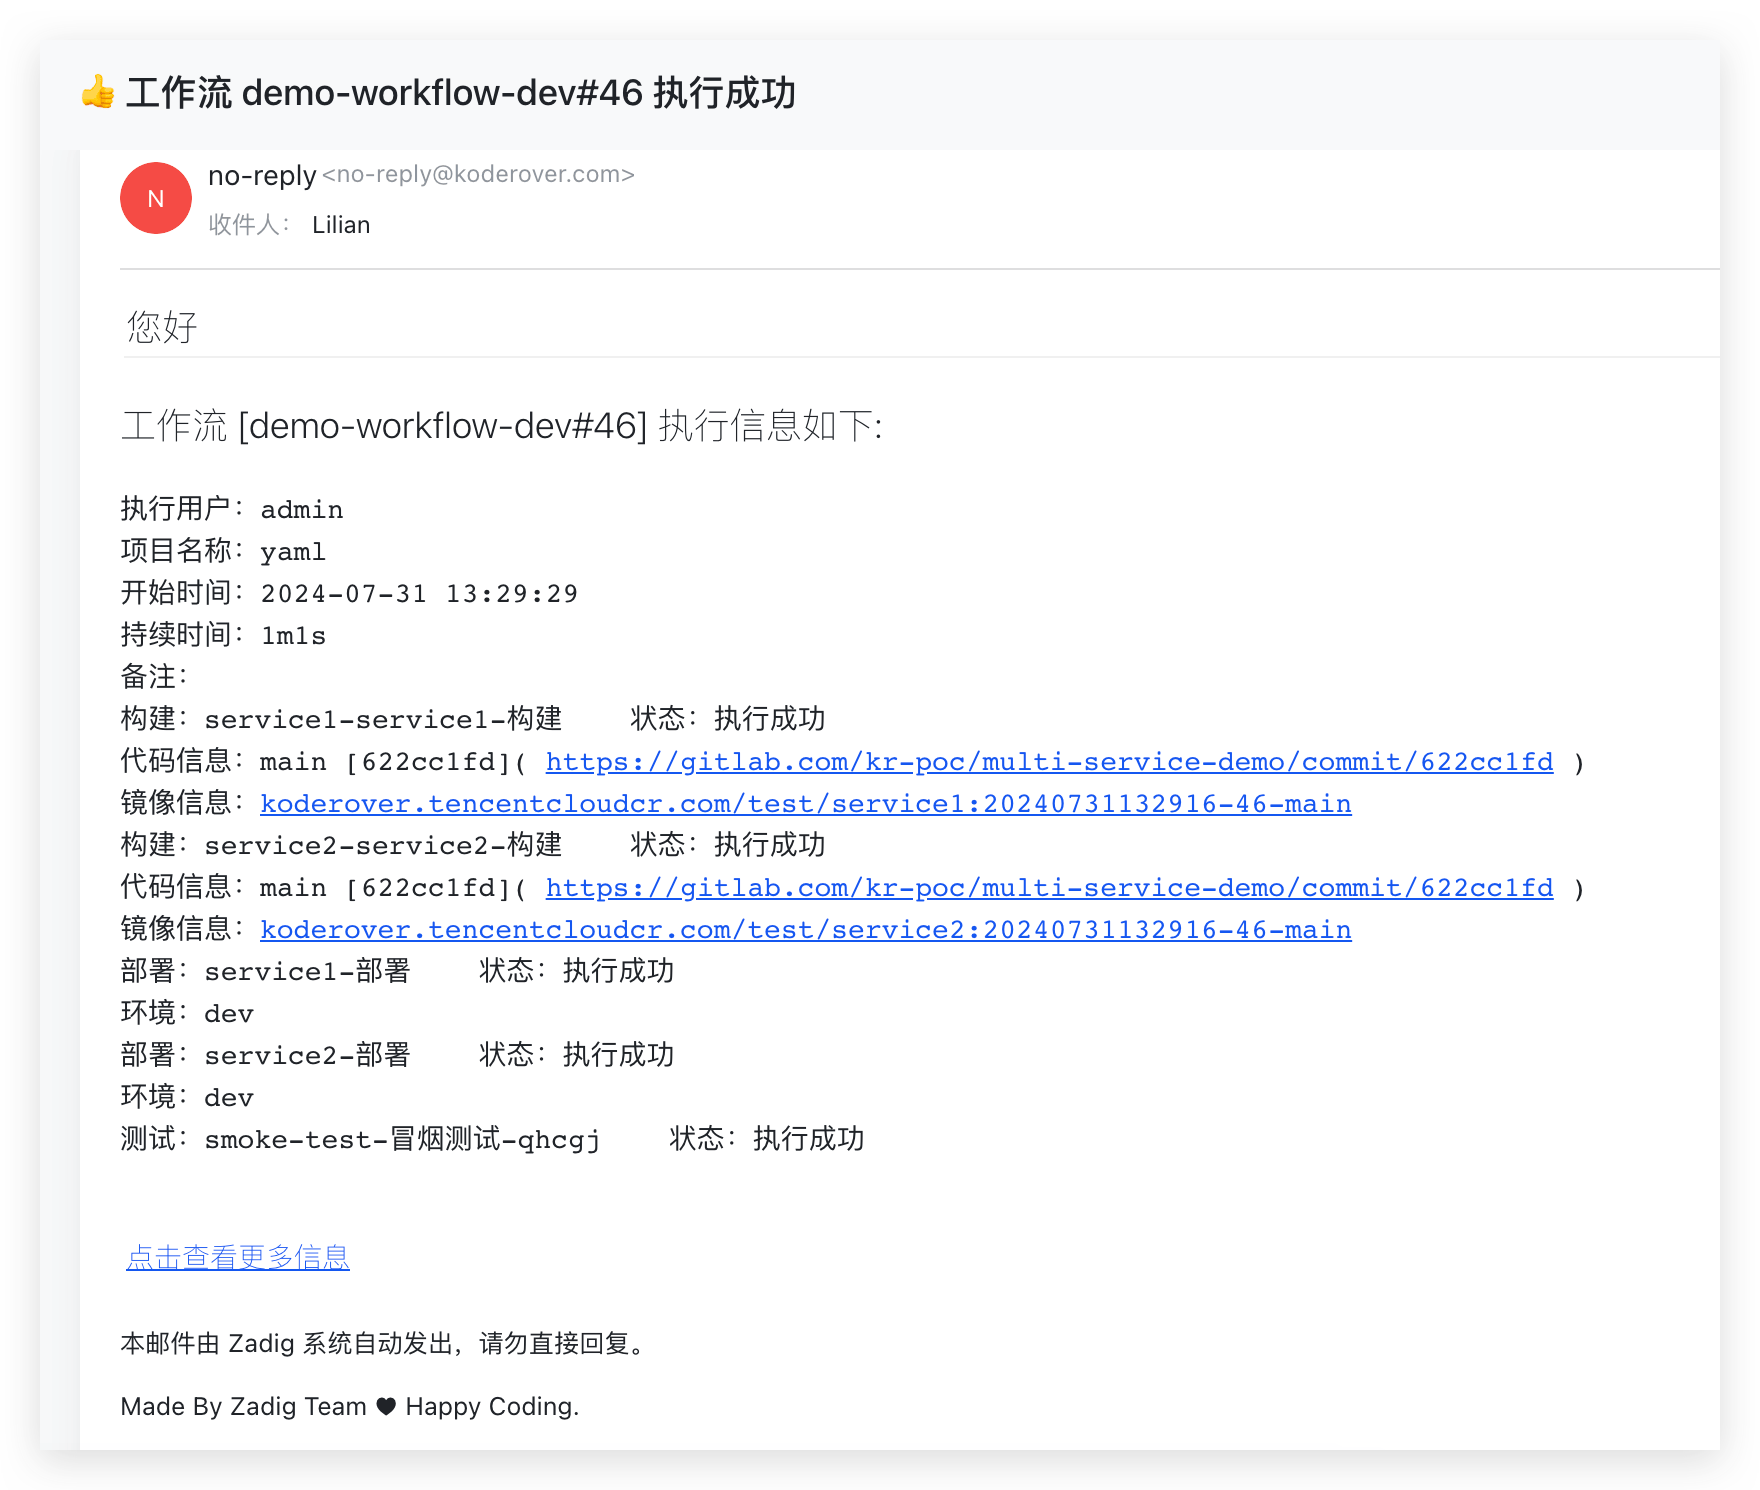
# Notification Effect
# Webhook Notification
# How to Configure
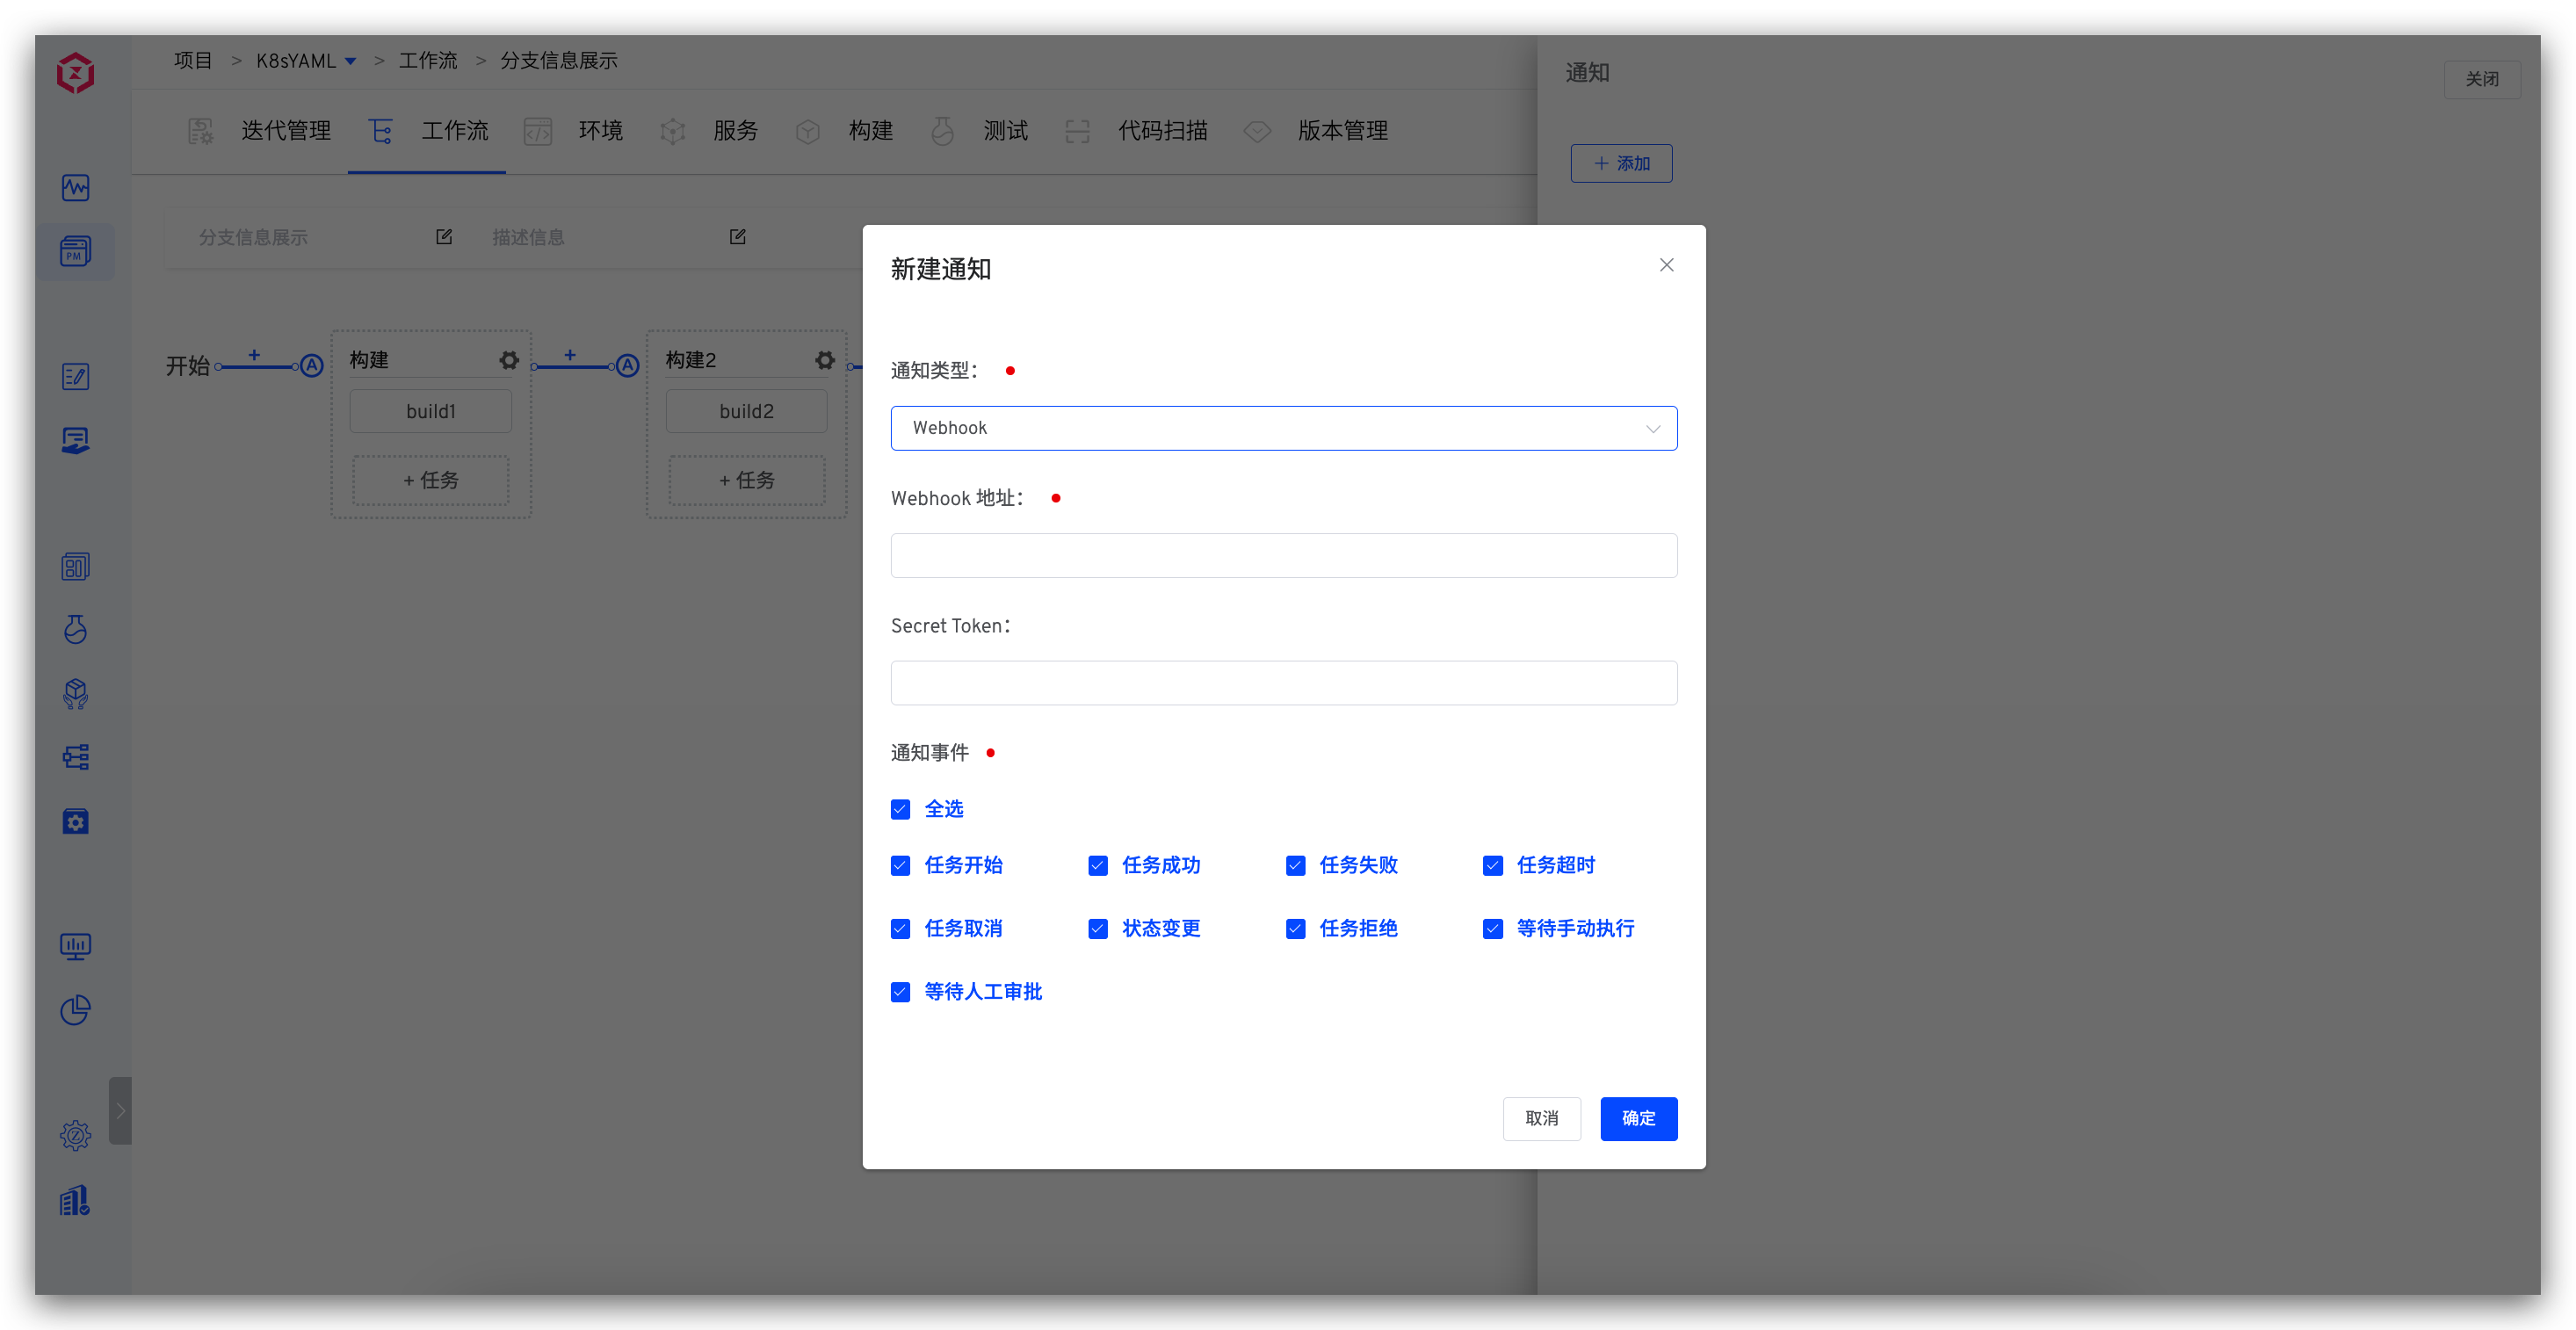
Edit the workflow and add a Webhook type notification.
# Payload
# Header Information
x-zadig-event: The value is workflowx-zadig-event-uuid: The unique identifier of the webhook eventx-zadig-instance: Zadig access addressx-zadig-token: If a Secret Token is configured, it will be sentx-zadig-webhook-uuid: The unique identifier of the Webhook
# Webhook Request Example
Details
curl -X "POST" "https://webhook.site/764375c9-3dd3-41a0-9392-e284015a811e" \
     -H 'Accept-Encoding: gzip' \
     -H 'X-Zadig-Webhook-Uuid: c1bdb079-2653-4f90-96f0-171e621583a9' \
     -H 'X-Zadig-Token: 764375c9-3dd3-41a0-9392-e284015a811e' \
     -H 'X-Zadig-Instance: https://course.koderover.com' \
     -H 'X-Zadig-Event-Uuid: 496534b5-8ac1-4c97-9ddd-be93821f6dc0' \
     -H 'X-Zadig-Event: workflow' \
     -H 'Content-Type: application/json' \
     -H 'Accept: application/json' \
     -H 'Content-Length: 1898' \
     -H 'User-Agent: Zadig/3.2.0' \
     -H 'Host: webhook.site' \
     -d $'{
  "object_kind": "workflow",
  "event": "workflow",
  "workflow": {
    "task_creator": "admin",
    "project_name": "yaml",
    "task_creator_id": "89358827-5137-11ee-b0c5-56d5fd1dd39e",
    "task_creator_email": "xxx@koderover.com",
    "stages": [
      {
        "status": "passed",
        "start_time": 1722404733,
        "end_time": 1722404763,
        "name": "build",
        "jobs": [
          {
            "status": "passed",
            "end_time": 1722404763,
            "start_time": 1722404733,
            "spec": {
              "repositories": [
                {
                  "source": "gitlab",
                  "repo_namespace": "kr-poc",
                  "branch": "main",
                  "commit_id": "622cc1fdfaa87cd72d33c227a1895b860c0e7bd3",
                  "commit_url": "https://gitlab.com/kr-poc/multi-service-demo/commit/622cc1fd",
                  "repo_name": "multi-service-demo",
                  "prs": null,
                  "tag": "",
                  "repo_owner": "kr-poc",
                  "commit_message": "Update deployment.yaml"
                }
              ],
              "image": "koderover.tencentcloudcr.com/test/service1:20240731134527-47-main"
            },
            "type": "zadig-build",
            "error": "",
            "name": "service1-service1-build"
          }
        ],
        "error": ""
      },
      {
        "status": "passed",
        "start_time": 1722404763,
        "end_time": 1722404771,
        "name": "deploy-dev-environment",
        "jobs": [
          {
            "status": "passed",
            "end_time": 1722404771,
            "start_time": 1722404763,
            "spec": {
              "env": "dev",
              "service_name": "service1",
              "service_modules": [
                {
                  "service_module": "service1",
                  "image": "koderover.tencentcloudcr.com/test/service1:20240731134527-47-main"
                }
              ]
            },
            "type": "zadig-deploy",
            "error": "",
            "name": "service1-deploy"
          }
        ],
        "error": ""
      },
      {
        "status": "passed",
        "start_time": 1722404771,
        "end_time": 1722404783,
        "name": "smoke-test",
        "jobs": [
          {
            "status": "passed",
            "end_time": 1722404783,
            "start_time": 1722404771,
            "spec": null,
            "type": "zadig-test",
            "error": "",
            "name": "smoke-test-smoke-test"
          }
        ],
        "error": ""
      }
    ],
    "error": "",
    "start_time": 1722404733,
    "workflow_name": "demo-workflow-dev",
    "detail_url": "https://course.koderover.com/v1/projects/detail/yaml/pipelines/custom/demo-workflow-dev?display_name=demo-workflow-dev",
    "task_id": 47,
    "remark": "",
    "workflow_display_name": "demo-workflow-dev",
    "end_time": 1722404783,
    "create_time": 1722404727,
    "status": "passed"
  },
  "release_plan": null
}'
2
3
4
5
6
7
8
9
10
11
12
13
14
15
16
17
18
19
20
21
22
23
24
25
26
27
28
29
30
31
32
33
34
35
36
37
38
39
40
41
42
43
44
45
46
47
48
49
50
51
52
53
54
55
56
57
58
59
60
61
62
63
64
65
66
67
68
69
70
71
72
73
74
75
76
77
78
79
80
81
82
83
84
85
86
87
88
89
90
91
92
93
94
95
96
97
98
99
100
101
102
103
104
105
106
107
108
109
110
111
112
113
114
# Specify Notification Targets via Variables
Feishu group notification (self-built application), Feishu member notification, DingTalk, Microsoft Teams, and email support specifying notification targets via variables. Enterprise WeChat and Feishu group notification (custom robot) are not supported yet.
- The variable format is
{{.variable}}. - You can reference Webhook payload variables, workflow variables, and custom job input/output variables:
- Webhook payload variables: for example
{{.payload.user_email}}. Fill in the fields according to the code repository Webhook payload - Workflow variables: for example
{{.workflow.params.email}},{{.workflow.params.NOTIFY_EMAIL}} - Custom job input/output variables: for example
{{.job.build.email}},{{.job.build.output.email}}
- Webhook payload variables: for example
- The final field name must be
email,mobile,phone,user_id,userId, oruid, or end with one of these names. Field names are case-insensitive.